This article describes the different ways you can purchase, manage and edit your UpSlide licenses on the portal.
Summary
- Purchasing licenses and options
- Managing licenses
- Importing and exporting licenses
- Pending requests
- Creating accesses for new portal managers on the platform
Purchasing licenses and options
When logging in to the portal, you’ll have direct access to your dashboard, which shows a summary of all assigned and available licenses and options, and a detailed view by account if teams are separated into different entities. You will also have direct access to the IT contact details and the UpSlide versions of the users.
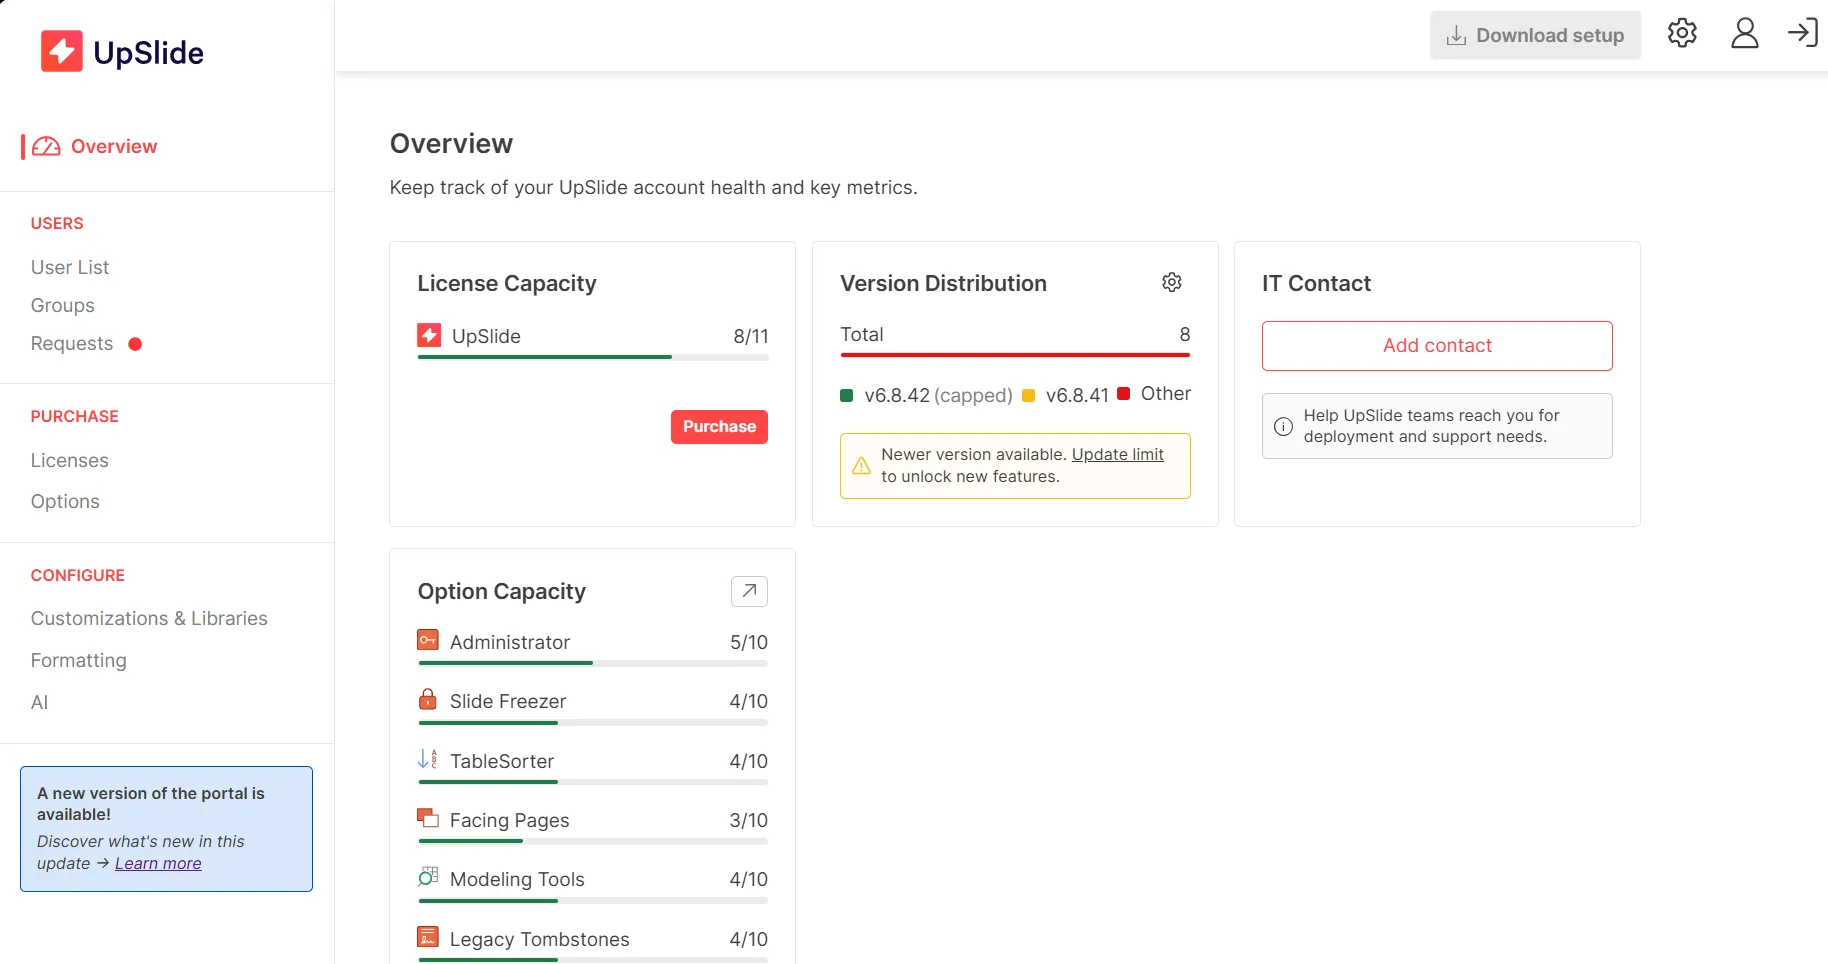
To purchase a license:
- Click Purchase in the red frame
- Enter the number of licenses you wish to purchase and click OK.
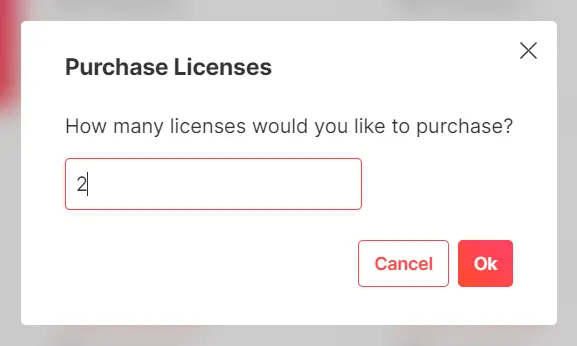
There will be a second window that appears asking you to confirm. When done, the licenses should automatically appear in the Dashboard.
Managing licenses
Overview of all users
To get an overview of all current UpSlide users click on User List. It shows the license status, available options, and version in use for each user.
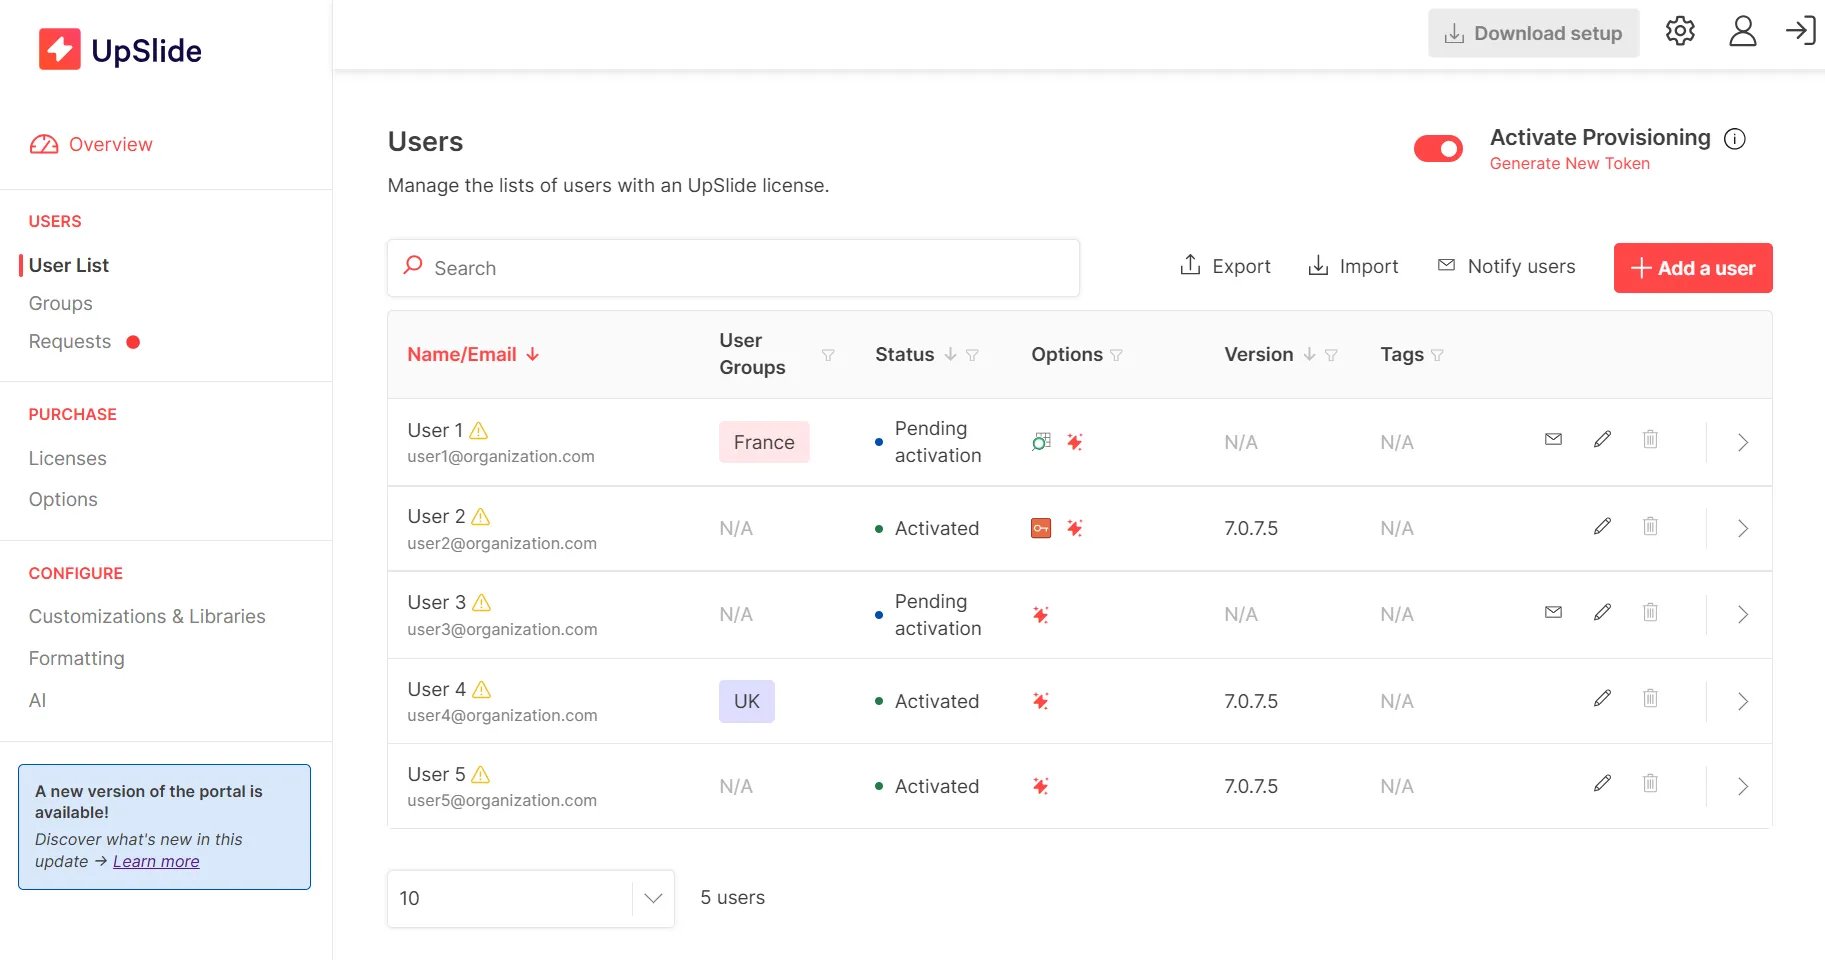
The different license statuses are:
- Assigned: the user has been granted a license but has not activated UpSlide yet.
- Activated: the user has activated UpSlide.
- Expired: the user hasn’t used UpSlide since the annual license renewal date. If the renewal occurred recently, this status is to be expected. You can check the renewal date by clicking the > next to a user’s license to see the license expiration date.
Assigning a new license manually
To assign a new license, click on Add a user. The popup allows you to fill in the necessary information, such as email address, which account they should be part of, and the options they might need. You can also add tags or assign a User group to manage your teams better.
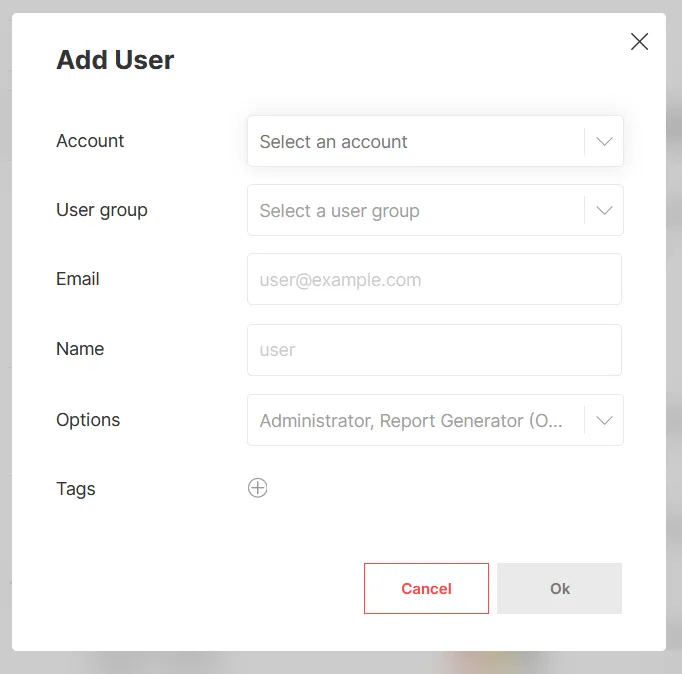
Available options depend on what you have purchased and assigned. If you have purchased two administrator options and have them both assigned to other users, you won’t be able to give this option to a new user until you remove it from an existing administrator.
Editing or removing single users
To edit user information, click on the pen icon next to the person’s email address in the Users tab. If you add an option to a user, the changes will be visible on their end only after they restart their Office applications.
Similarly, you can click on the trashcan icon to delete a user license. They will lose access to UpSlide when they next restart Microsoft Office.
Importing and exporting licenses
The import function in the Users tab allows you to perform massive updates using a .csv or .xlsx file to assign multiple groups, options, and tags at once. Exporting gives an overview of current UpSlide licenses.

Creating a file to import
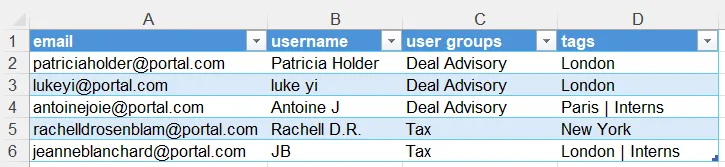
The import file can be a .csv or a .xlsx file. We recommend creating .xlsx files as they are easier to edit. You’ll find below the list of columns that should be in your import file.
- email
- If the email address in the import file already exists in the portal, the license will be edited.
- If the email address in the import file doesn’t exist in the portal, the license will be created.
- username
- You don’t need to add a username to create a license, but it will be easier for you to identify who it’s attributed to.
- tags
- Tags can be used to identify business units, offices, etc. If several tags can be attributed to a single person, you can separate them using pipe symbols “|”.
If you purchased options, there are two ways to attribute them to your users by adding the following columns in your .xslx file:
- user group
- Write the user group the license should be part of. If a user can be part of several user groups, you can separate them using pipe symbols “|”.
If the user group written doesn’t exist, the license will not be edited or created. Create user groups in the portal before importing your users.
- writing the option directly as the column title
- Administrator
- Dynamic libraries
- Modeling Tools
- Facing Pages
- Power BI features
- Slide Freezer
- Tablesorter
Each of these fields must be set to “True” or “False” depending on whether they should be attributed to the license or not.

If you made a typo in an email address during an import and wish to modify it, you must do so manually by clicking on the pen to the right of the email address.
Import file creation for new provisioning
The import process has recently evolved due to the new provisioning system. For clients using the new provisioning (V2), the import file format has been updated to include additional columns. Below are the details for creating and importing files under the V2 system:
- Options: Possible values are now “True”, “False”, or “Inherited”. “Inherited” indicates the option is obtained from a user group, not directly assigned to the user.
- License (multi-license accounts): The exact license name must be specified (only one license per user). This column appears only if your account has multiple license types.
- User Groups: Groups are separated by the ”|” symbol (e.g., Group1|Group2).
User groups and options can now be updated in a single operation, eliminating the need for separate steps. Ensure the Excel file adheres to these formats to prevent import errors.
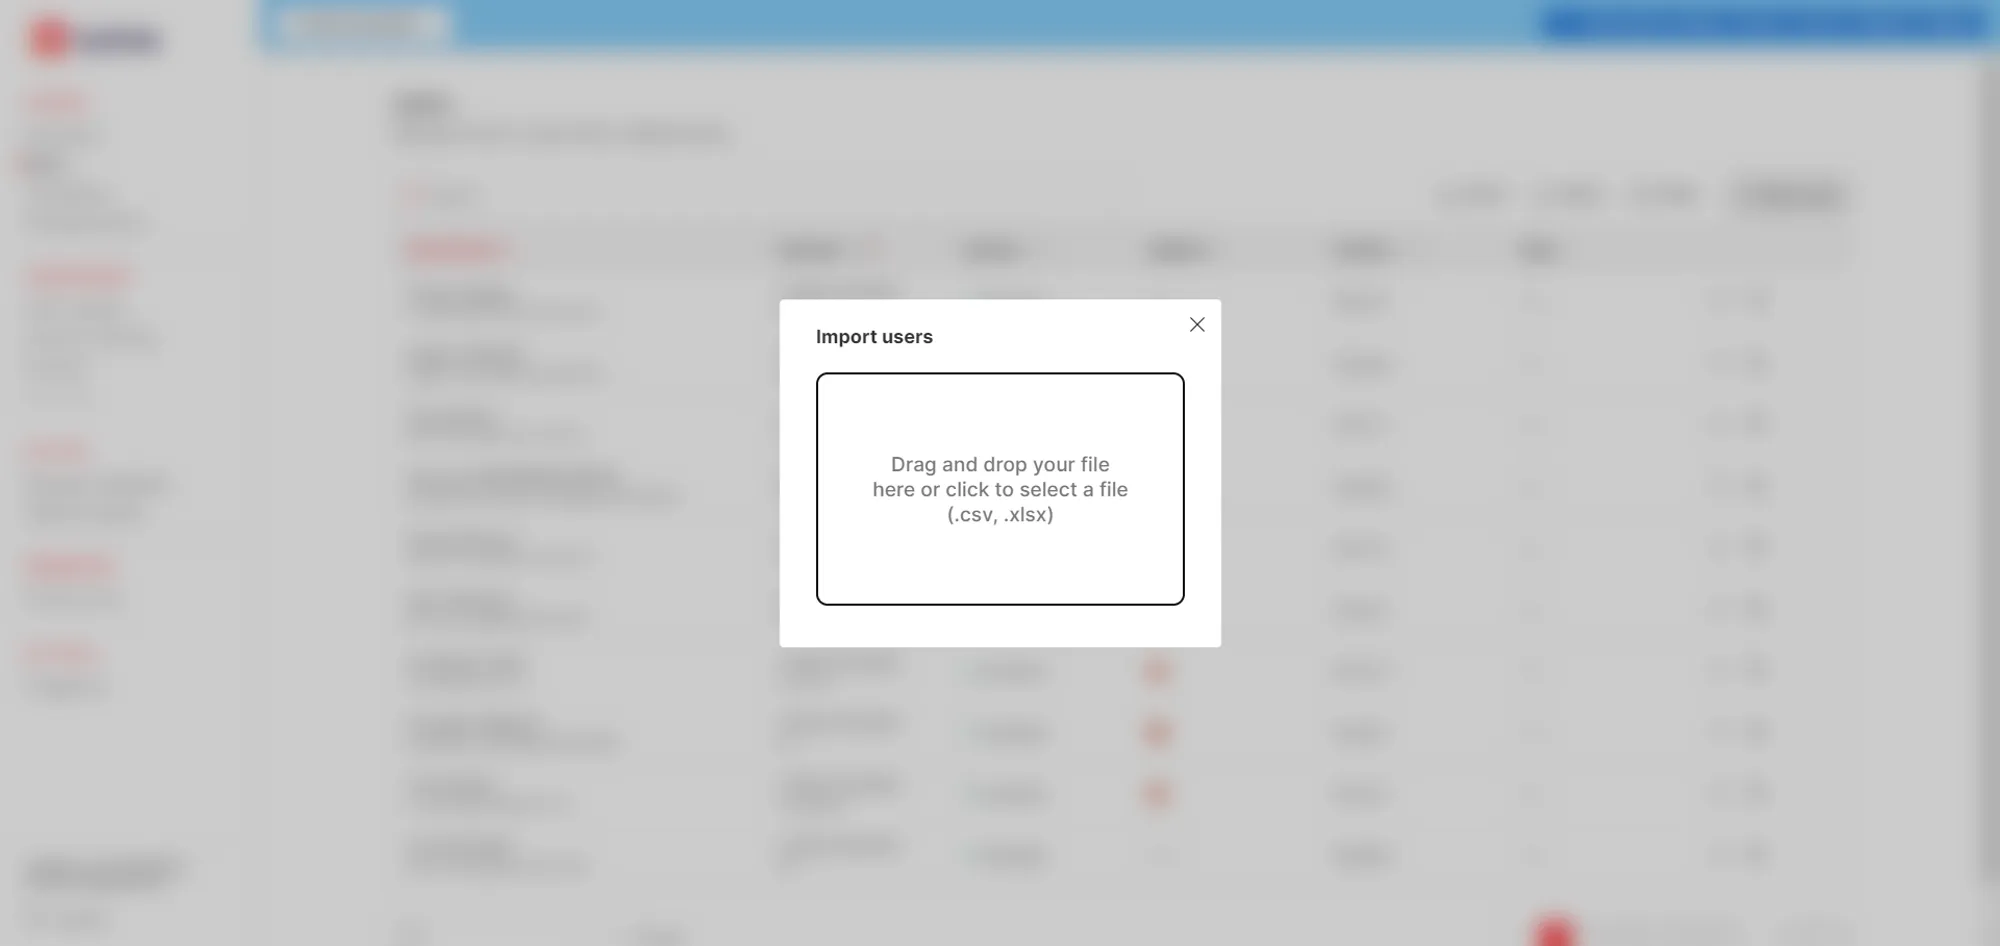
Importing
- Select “Import” at the top of the screen, and add your file.
- Click on “Drag and drop your file here or click to select a file (.csv, .xlsx)”, or drag your file on the designated field.
Exporting
You can click on the export button to download a .xlsx or .csv file with information about current licenses affected.
The export include information about options and groups, whether the user is provisioned or not, as well as additional columns such as the license creation and expiration date, the UpSlide version, tags, and the UpSlide installer version.
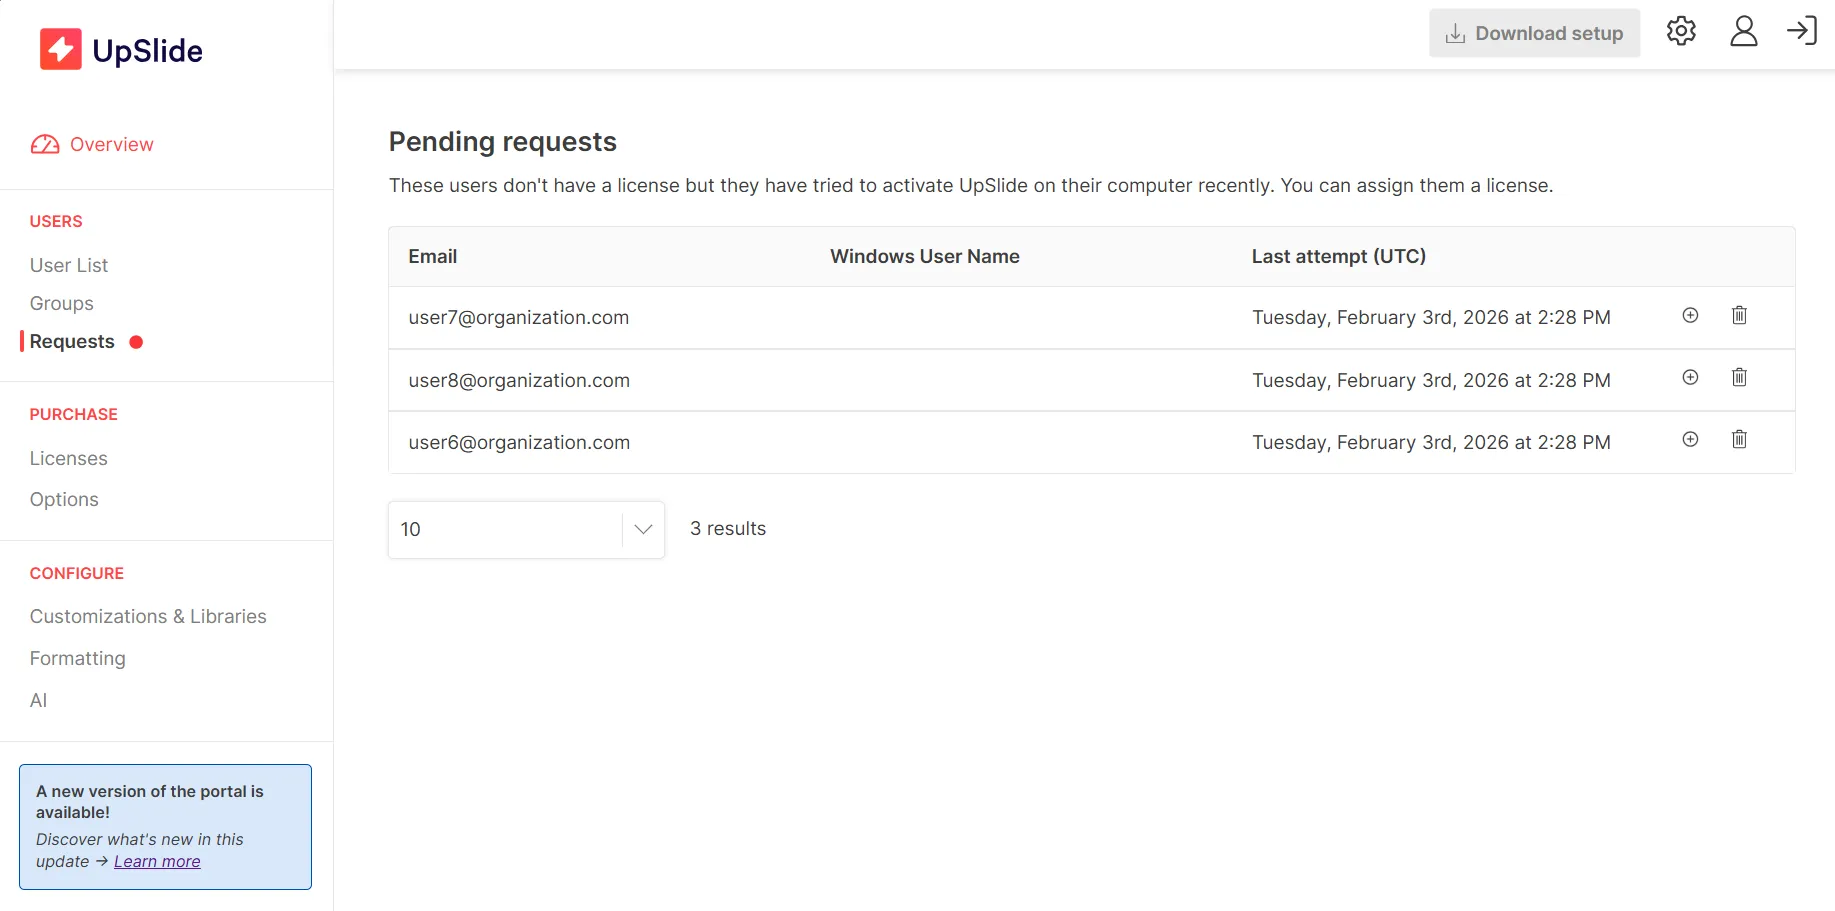
Pending requests
A user who has UpSlide installed on their computer but hasn’t been granted a license yet can request one. These requests are visible in the Pending requests tab.
You can click on the + sign next to the request to create the license directly from this view.
You can turn on notifications to receive an email every time someone requests an UpSlide license by going into Configuration > My profile.
Creating accesses for new portal managers on the platform
If you need more people to be able to access the portal, you can create their access by clicking the gear in the top right of the portal :

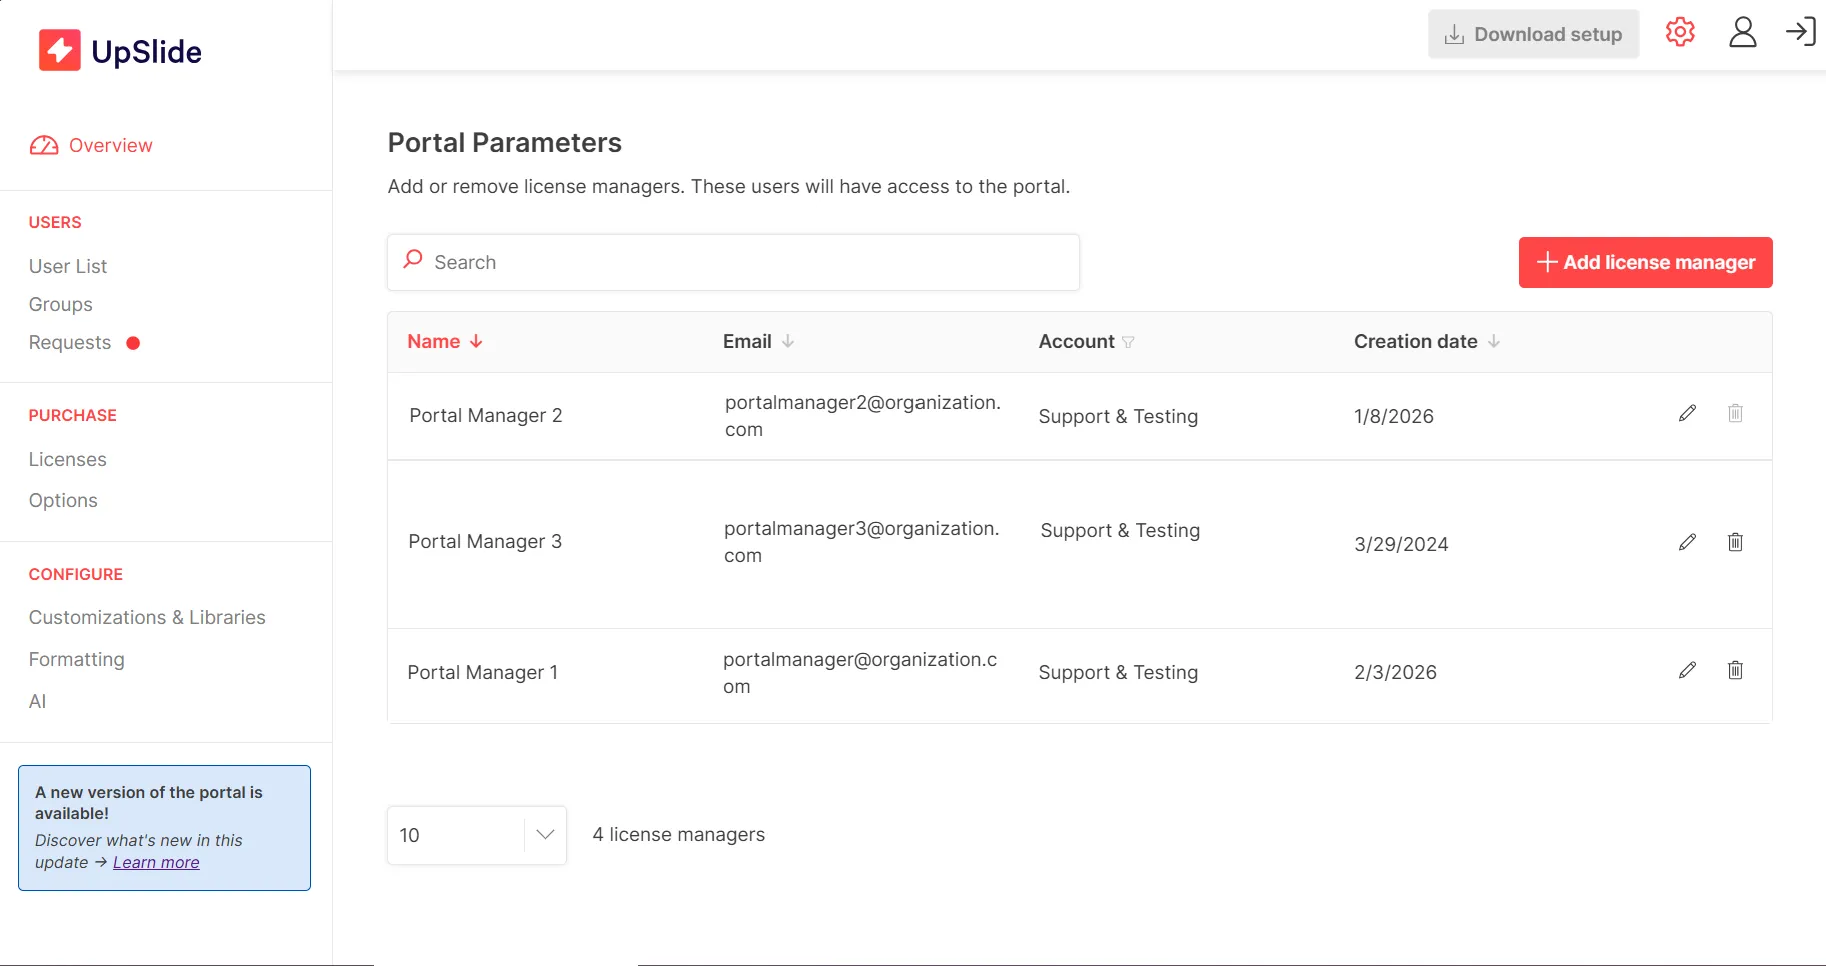
Click Add license manager to create a new access and select the following parameters:
- Name
- Permissions, you can select Assign if the person should only be able to create licenses, Purchase to buy new ones and Transfer to be able to transfer licenses between two or more accounts.
- Portal Access Management allows a user to create access for new portal managers.
- SSO Configuration, if one is set up for your company, you can select it so portal managers can connect automatically to the portal through your company’s authentication system.
- Accounts to manage, if you have several accounts with UpSlide, a portal manager can overview all accounts or only a specific one depending on your company’s internal organization.
- Email language, when the portal manager access is created, an email will be sent to the user to generate their password.
If you can’t see this section and would like to, contact support@upslide.net so they can grant it to you.