Use UpSlide's Finalize and Send features to prepare a PowerPoint presentation for sharing or submission. You can refresh the presentation, remove links, save a separate copy, send it by email, and add PDF appendices.
Choose between Finalize and Send
Finalize and Send are functionalities that allow you to create the final version of your presentation by removing cross-references, Excel links, notes, or comments. The difference is what happens next: Finalize saves a copy, while Send attaches it to a new email or sends it to a Teams conversation.
Finalize a presentation

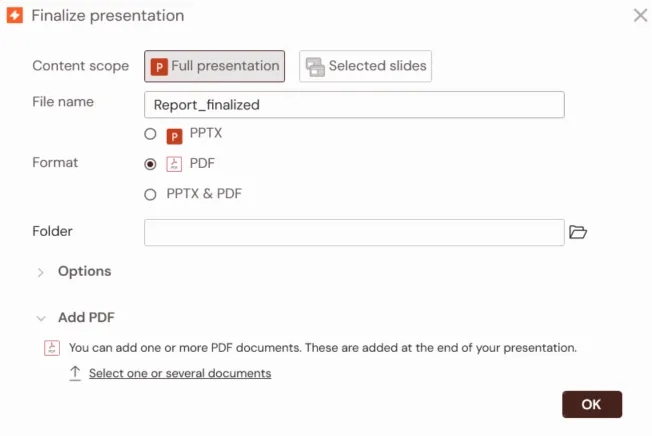
Use Finalize to save a separate copy of your presentation without sending it immediately. To finalize your presentation.
- Click Finalize in the UpSlide ribbon.
- Choose whether to finalize the entire presentation or only the selected slides.
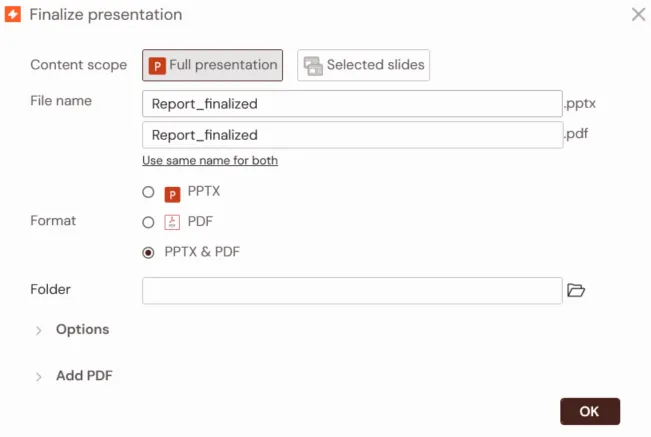
- Select the output format: .pptx, .pdf, or both.
- Enter the file name and where to save the file. If you’ve selected to save your file as both a .pptx and a .pdf, you’’‘ll have to enter a file name for both.
- Select the options to apply. The different options to apply are detailed in this article.
- Click OK.
Send a presentation

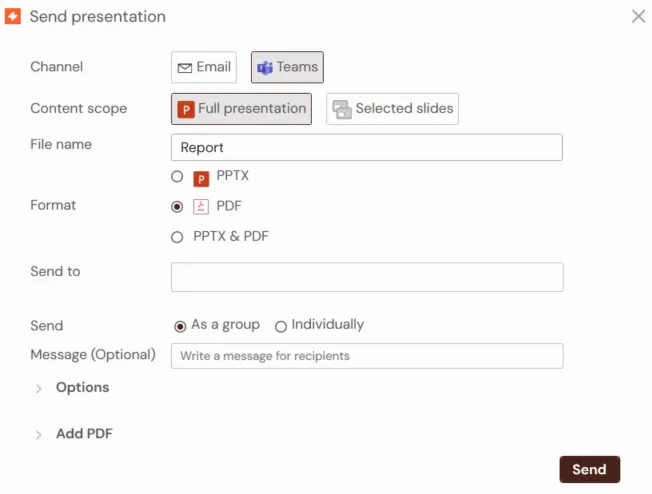
Use Send to prepare your presentation and attach it to a new email or Teams conversation immediately. To send your presentation.
- Click Send in the UpSlide ribbon.
- Choose if you’d like to send your presentation via email or Teams.
- If you send it via email, a new email window will open once you click OK.
- If you send it via Teams, new fields will be added to the Send window to select recipients, add an optional message, and send it as a group or individually.
- Choose whether to send the entire presentation or only the selected slides.
- Select the output format: .pptx, .pdf, or both.
- Enter the file name. If you’ve selected to save your file as both a .pptx and a .pdf, you’ll have to enter a file name for both.
- Select the options to apply. The different options to apply are detailed in this article.
- Click OK.
Review the options available
To review the different options available for the Finalize and Send, click the Options dropdown menu in their respective windows:
- Refresh: Update section dividers, reminders, table of contents, cross-references, footnotes, and endnotes.
- Break Excel links: Removes links between the presentation and Excel text, tables, and charts created with UpSlide. The content remains in the presentation but can no longer be updated.
- Remove cross-reference links: Removes the hyperlinks created with the cross-reference feature. The content remains in the presentation but can no longer be updated.
- Remove endnote hyperlinks: Removes the hyperlinks created with the endnote feature. The content remains in the presentation but can no longer be updated.
- Break Power BI links: Removes the hyperlinks created with the Power BI link feature. The content remains in the presentation but can no longer be updated.
- Remove notes and comments: Deletes all PowerPoint notes and comments from the copy.
Add PDF documents to your final presentation
You can add one or more PDF appendices when you use Finalize or Send.
- Click Finalize or Send in the UpSlide ribbon.
- Choose .pdf as the output format.
- Open the Add PDF dropdown menu and click Select one or several documents.
You can reorder documents if needed by hovering over a document name and using the arrows to move it up or down. If you’d like to remove a document, click the ellipses and choose Delete.