The following instructions are not mandatory. UpSlide has its own Tenant to connect with SharePoint, so you don’t need to create one. However, if you don’t want UpSlide to use its Tenant, here is the procedure to create your own Single Tenant application in Microsoft Entra ID.
Summary
- Create the Microsoft Entra ID application
- Customize the application
- Add needed permissions
- Grant consent for the whole tenant
- Send the details of your app to UpSlide
Create the Microsoft Entra ID application
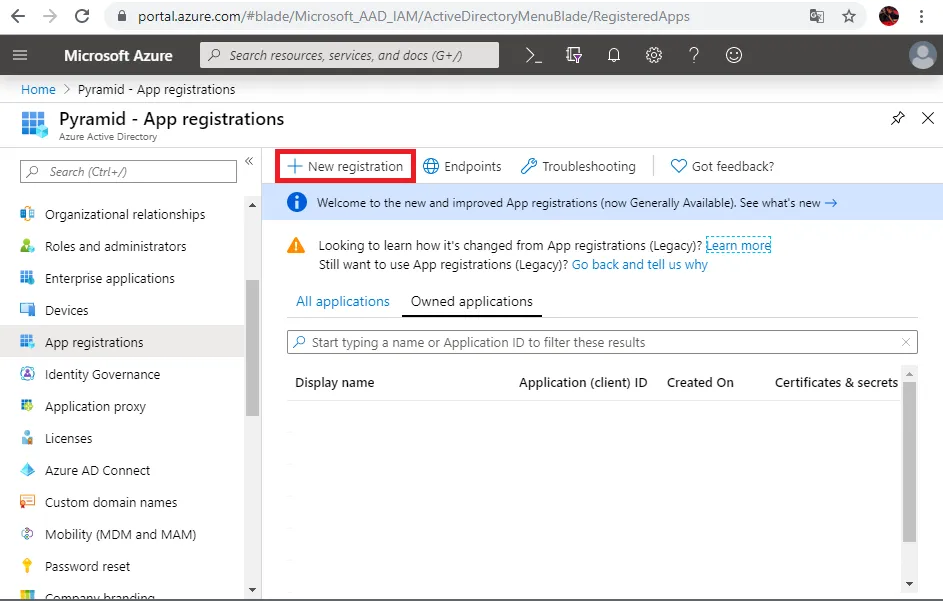
Connect to Azure Portal using tenant administrator rights and go to Microsoft Entra ID and go to App Registration and click New Registration.
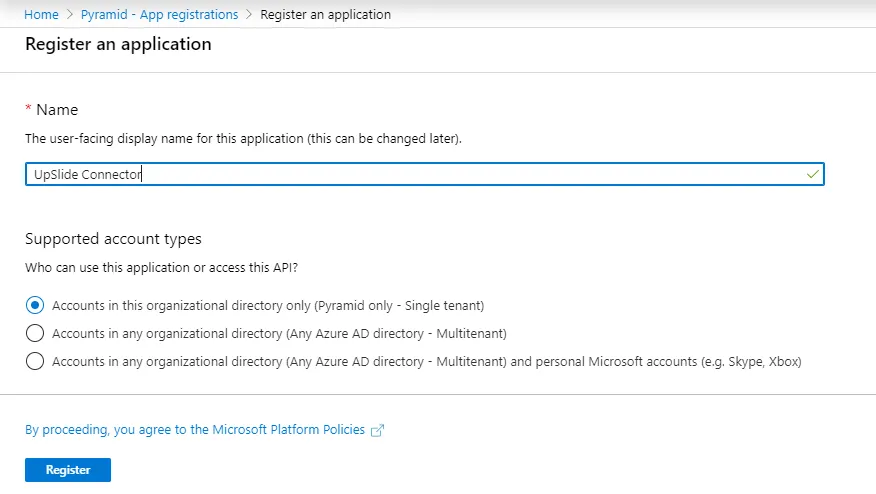
Set a name for your application, and make sure that Supported account type is set to Accounts in this organizational directory only.
Once the application has been created, you will need to:
- Customize the application to be recognized as a Client (Desktop) application.
- Set scopes and grant consent for all the users.
Customize the application
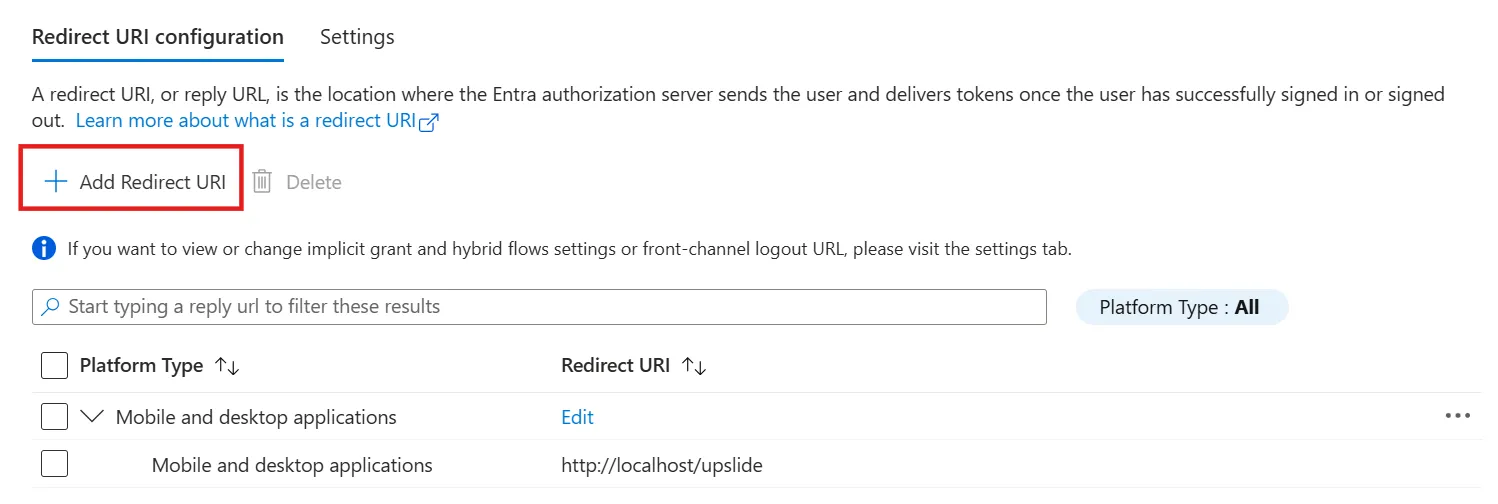
Click Authentication, then Add redirect URI.
Select Mobile and desktop applications. and set a custom redirect URI, for example, http://localhost/upslide.
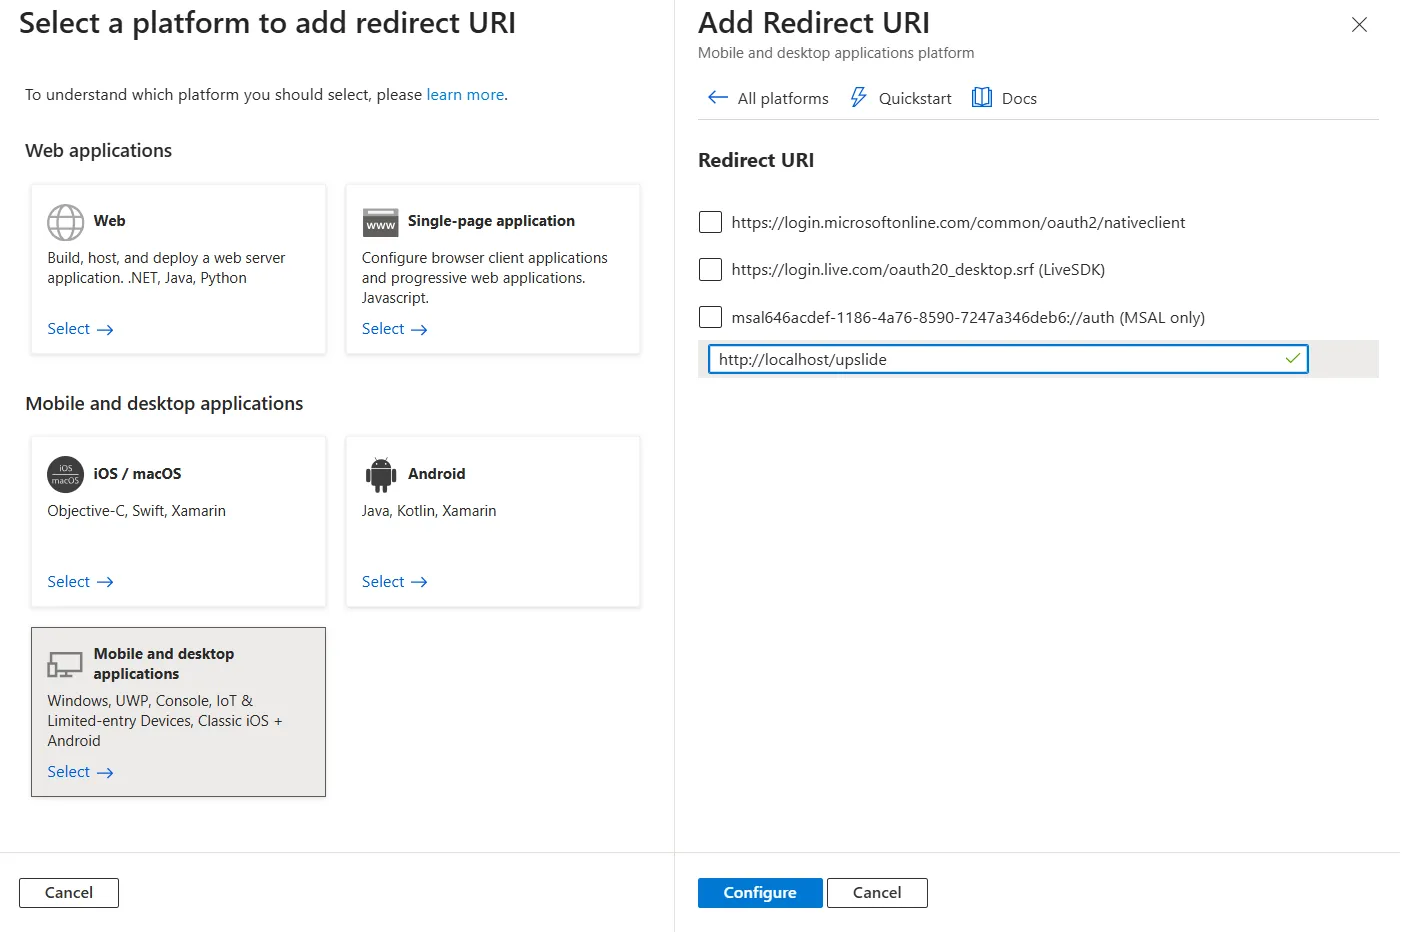
This URL will never be used, so it does not need to target a real working URL, but it is needed to set the AAD App to Client mode. We will need this information to set up the link on our side.
The redirect URI must exactly match the URI configured by UpSlide. Do not use a wildcard redirect URI or register a different URI without confirming the change with the UpSlide team.
Still in the Authentication tab under the Settings menu, enable the Allow public client flows toggle. This allows UpSlide to operate without requiring a locally running server to handle authentication.
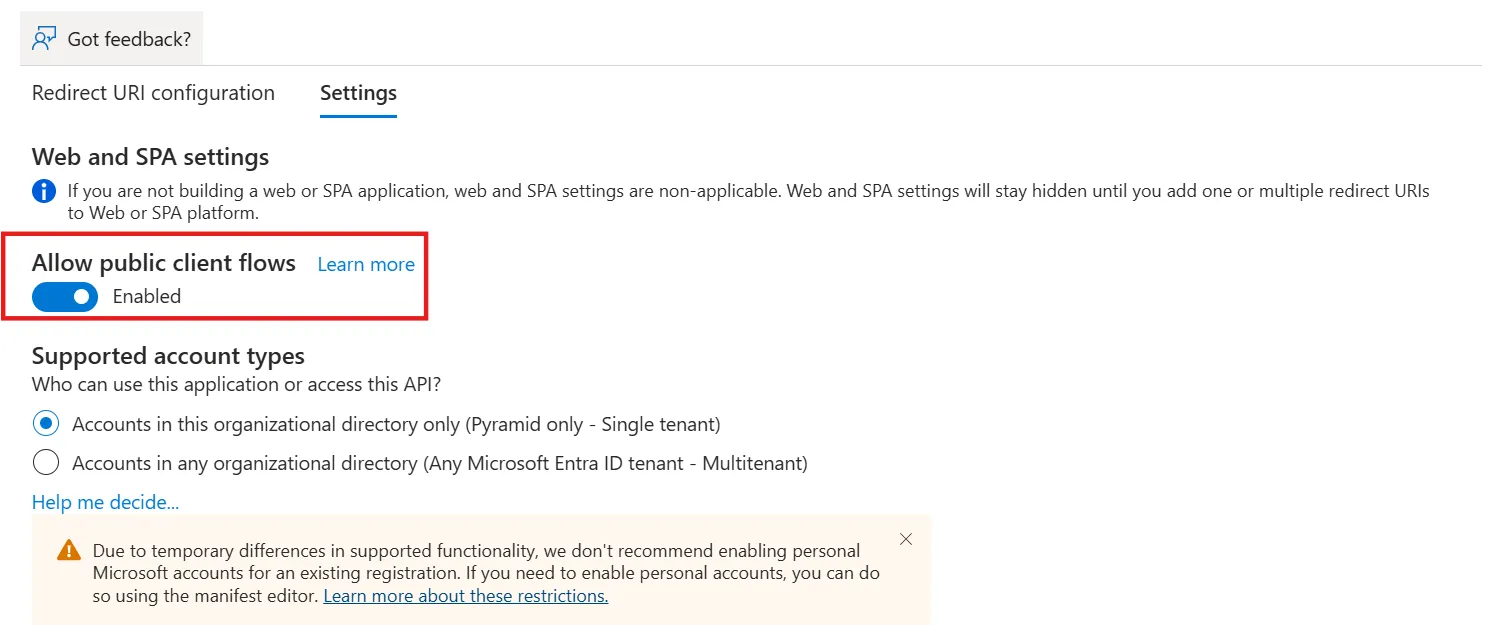
This setting is required for the current UpSlide desktop authentication implementation. The UpSlide add-in runs locally inside PowerPoint, Excel and Word and does not have a server-side component that can store a client secret.
The application must therefore be registered as a public client to support both authentication paths used by UpSlide:
-
Windows Web Account Manager (WAM), used as the primary authentication method available.
-
Authorization Code Flow with PKCE through an embedded browser, used as a fallback when WAM cannot be used.
Add needed permissions
- Go to your application and go to API Permissions, then click Add a permission.
- Select SharePoint, choose Delegated Permissions as type of permissions required, and check the permissions below:
- AllSites.Write
- AllSites.Manage
- Click Add permissions to validate the selection.
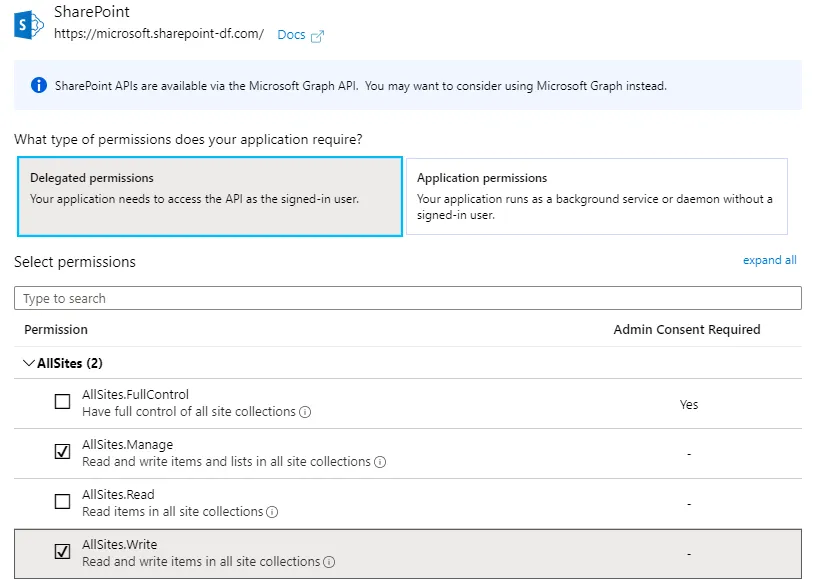
- Click Add a Permission again and APIs my Organization uses and search for Microsoft Graph.
- Apply the delegated permissions listed below. Delegated permissions do not overtake the current users permissions.
- Files.Read.All
- Sites.Read.All
- User.Read
- offline_access
- openid
- profile
Grant consent for the whole tenant
In the API permission page, click Grant admin consent for Company to be redirected to a consent page. You will find the list of permissions previously added, and will be able to grant the consent for your organization.
Send the details of your app to UpSlide
Once the app registration is complete, please send us the following information:
- Application client ID
- Subscription (tenant) ID
- Configured reply URL
Our team will adapt the Library authentication settings to work with your application.