In this article, we will guide you to deploy the SharePoint connector app with the Site.Selected permissions, from creating the app in Azure to granting the app access to specific SharePoint sites using the Microsoft Graph API.
Pre-requisites
Before you begin, ensure you have the following:
- Access to the Microsoft Azure portal with permissions to create and manage App Registrations
- SharePoint Administrator permissions to grant access to specific sites via the Microsoft Graph API.
Create the app registration
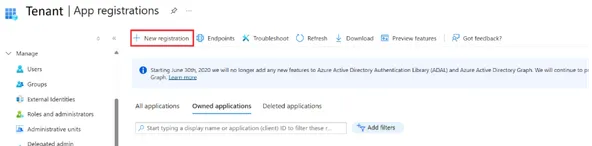
Log in to your Azure portal and navigate to EntraID, then select App registrations > New registration.
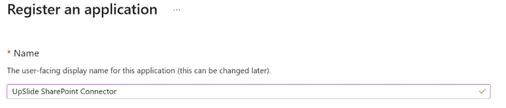
Enter the application name. You can use “UpSlide SharePoint Connector” or a name recognisable to your organisation. You will need the app name later on in the procedure.
Add a Redirect URI with the platform set to Public client/native (mobile & desktop). The redirect URI must mention the primary domain or your tenant. For example https://yourcompagny.com/redirect or https://yourcompany.com/upslide-app

Once the app is created, note down the app ID, tenant ID, and URI. It will be necessary later on in the procedure,
Configure the API permissions
Understand the scopes
Permissions, also known as scopes, define which data or operations your app can access via the Microsoft Graph. For UpSlide, delegated permissions ensure the add-in runs in the user context.
- Delegated permissions: used when the app acts on behalf of a signed-in user.
- Application permissions: used when the app runs without a user (background services).
Why do we use these scopes:
- profile / openid: Required for user authentication and identity.
- User.Read: Basic read access to the signed-in user’s profile.
- Sites.Selected: Core permission: gives the app no SharePoint access by default. Access is later granted only to specific sites using the Graph API. This scope enforces the least privileges.
Add Permissions to the newly created app registration
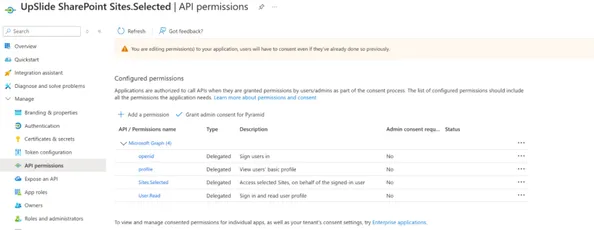
Go to the app’s API permissions > Add a permission and select Microsoft Graph > Delegated permissions.
Add the following scopes:
- profile
- openid
- User.Read
- Sites.Selected
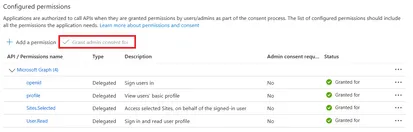
Request Admin consent for the tenant. The status should update to Granted for yourTenant and allow the app to use the SharePoint site.
Use Graph Explorer or Postman with a SharePoint administrator account
Get your SharePoint site ID
Use Graph Explorer to perform a GET request and retrieve your SharePoint site ID.
- Sign in to your Windows account
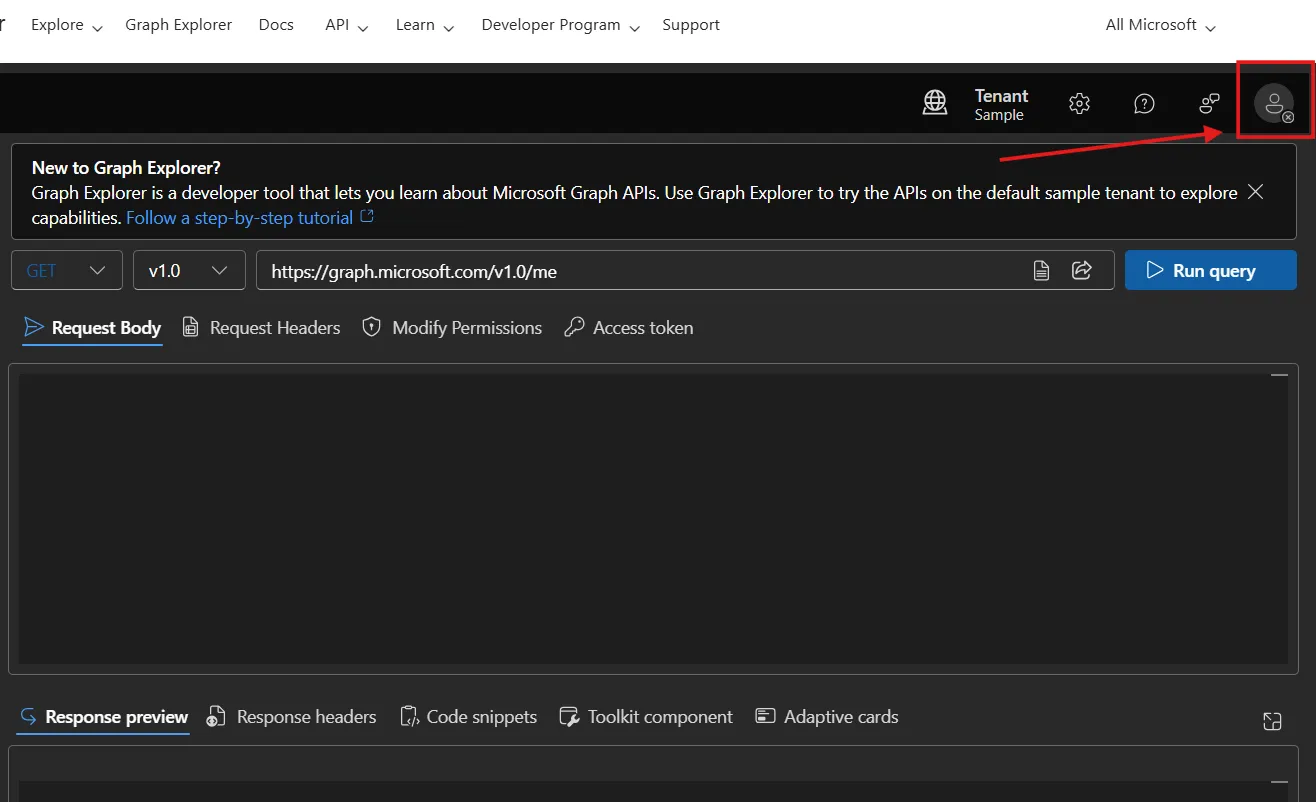
In Graph Explorer, set the request method to GET. Then, in the URL field, enter the following URL, replacing {YOUR_TENANT} and {SITE_NAME} with your tenant and SharePoint site name:
- https://graph.microsoft.com/v1.0/sites/ {YOUR_TENANT} .sharepoint.com:/sites/ {SITE_NAME}
The response should look like this:
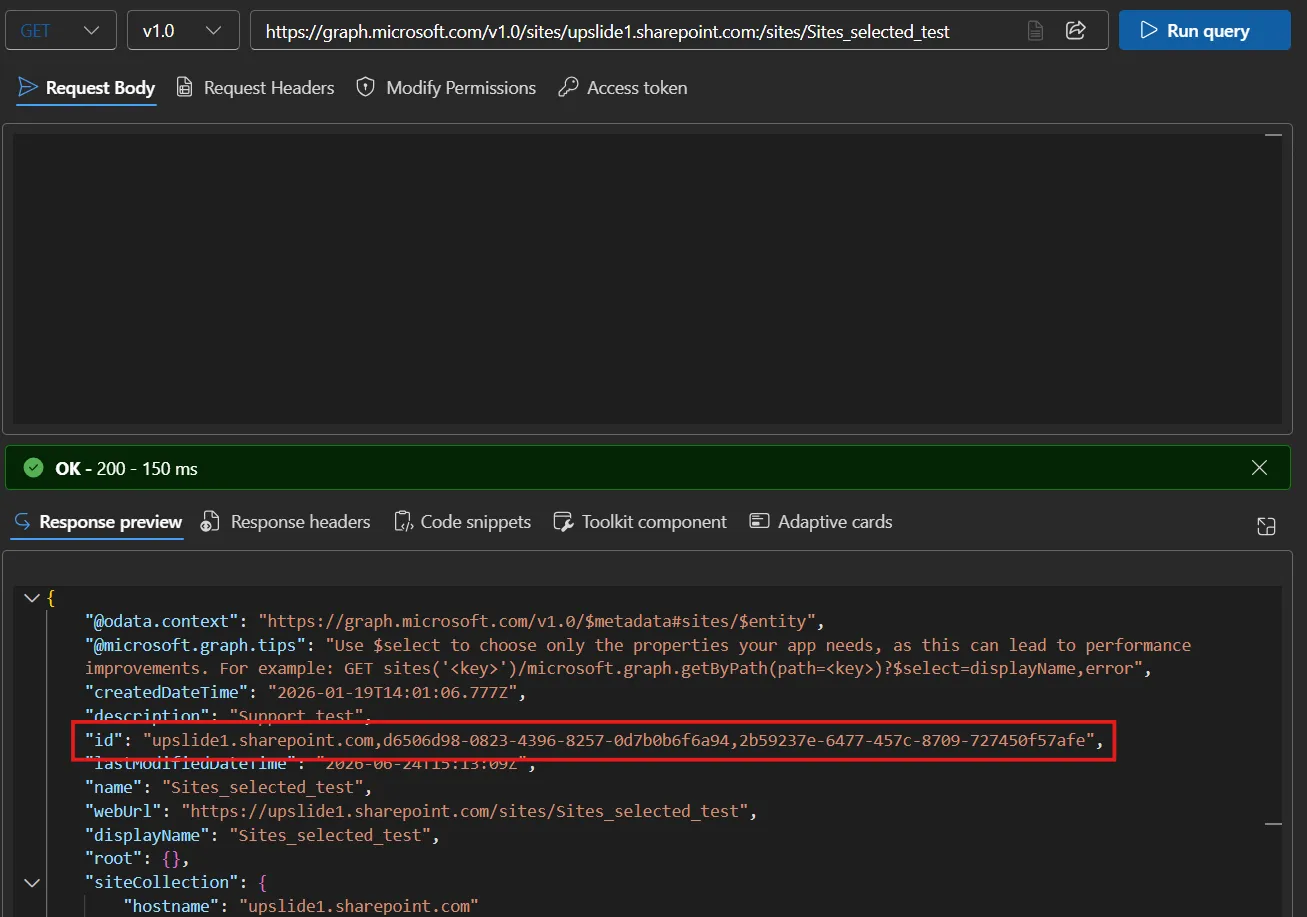
Make a note of the site ID from the JSON response, as you will need it in the following steps.
Assign site permissions to the app
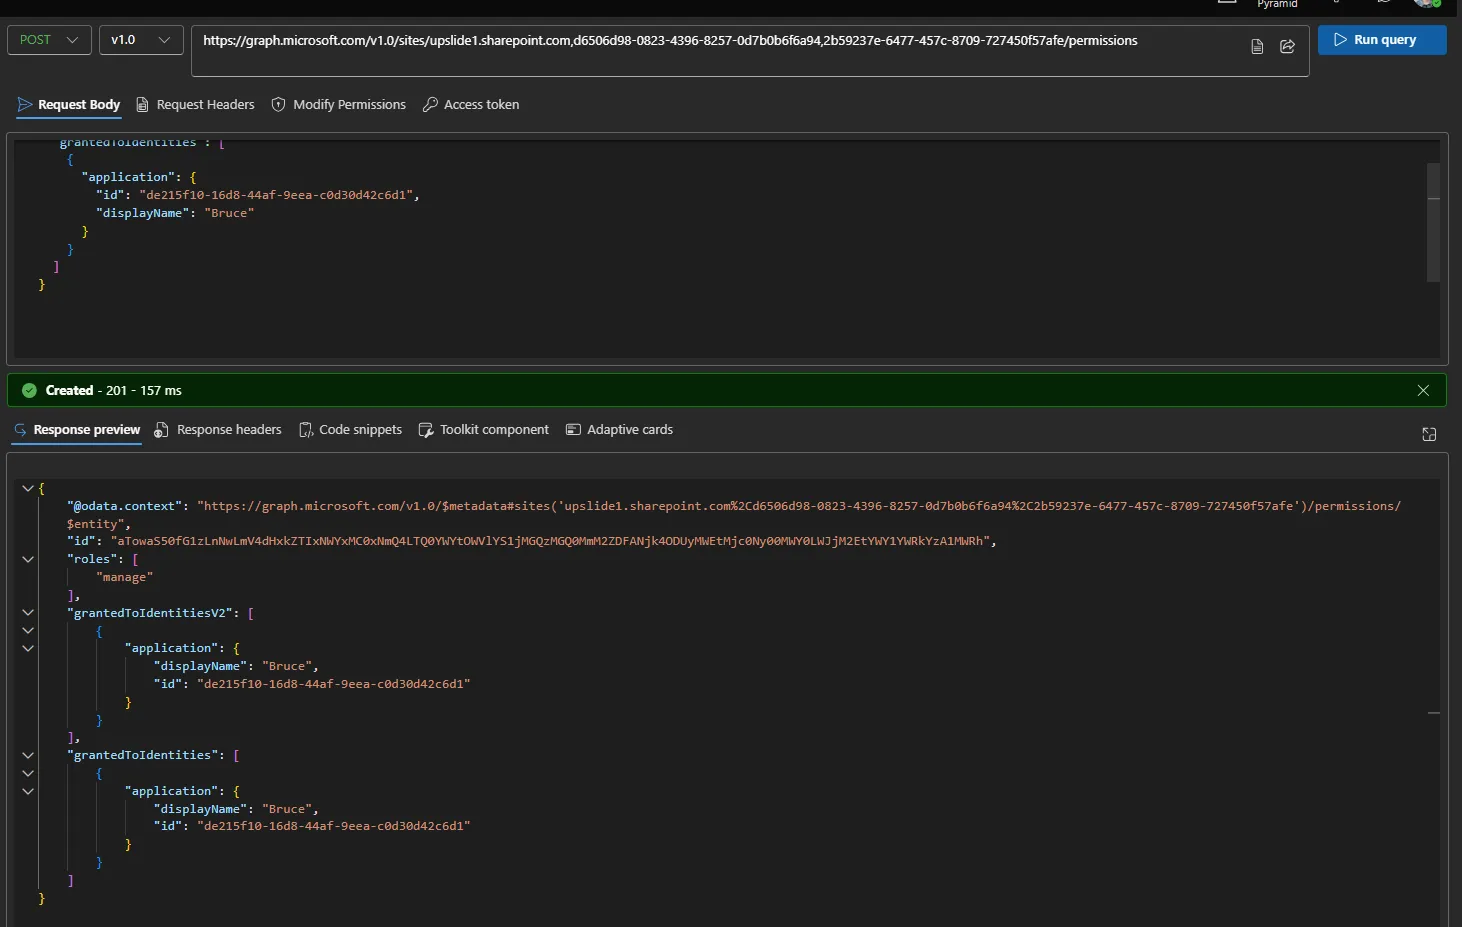
In Graph Explorer, switch to the POST method and run a request to grant the application access to the SharePoint site.
- Set the request method to POST.
- Use the following URL and update the site ID with the value from the GET request, https://graph.microsoft.com/v1.0/sites/ {SITE_ID}/permissions
- Use the following Request Body
- Ensure you update the value of “Your app ID” and “Your app name”.
\{
  "roles": ["manage"],
  "grantedToIdentities": [
    \{
      "application": \{
        "id": "Your app ID",
        "displayName": "Your app name"
      \}
    \}
  ]
\}
Send AppID & Tenant ID to UpSlide
Once complete, provide the following to the UpSlide team to set it on the setup/add-in settings:
- App ID
- Tenant ID
- Redirect URL