Use Text overflow to continue text across multiple shapes or slides. This feature lets you manage long text without copying and pasting content across different shapes.
Overflow text between shapes
Use Text overflow to dynamically manage text between shapes on a slide. To activate Text overflow:
- Select the shape where you want the text flow to start.
- In the UpSlide ribbon, select Text overflow.
- Select the shape where you want the text to continue.
- Select the first shape in the overflow chain to update the flow.
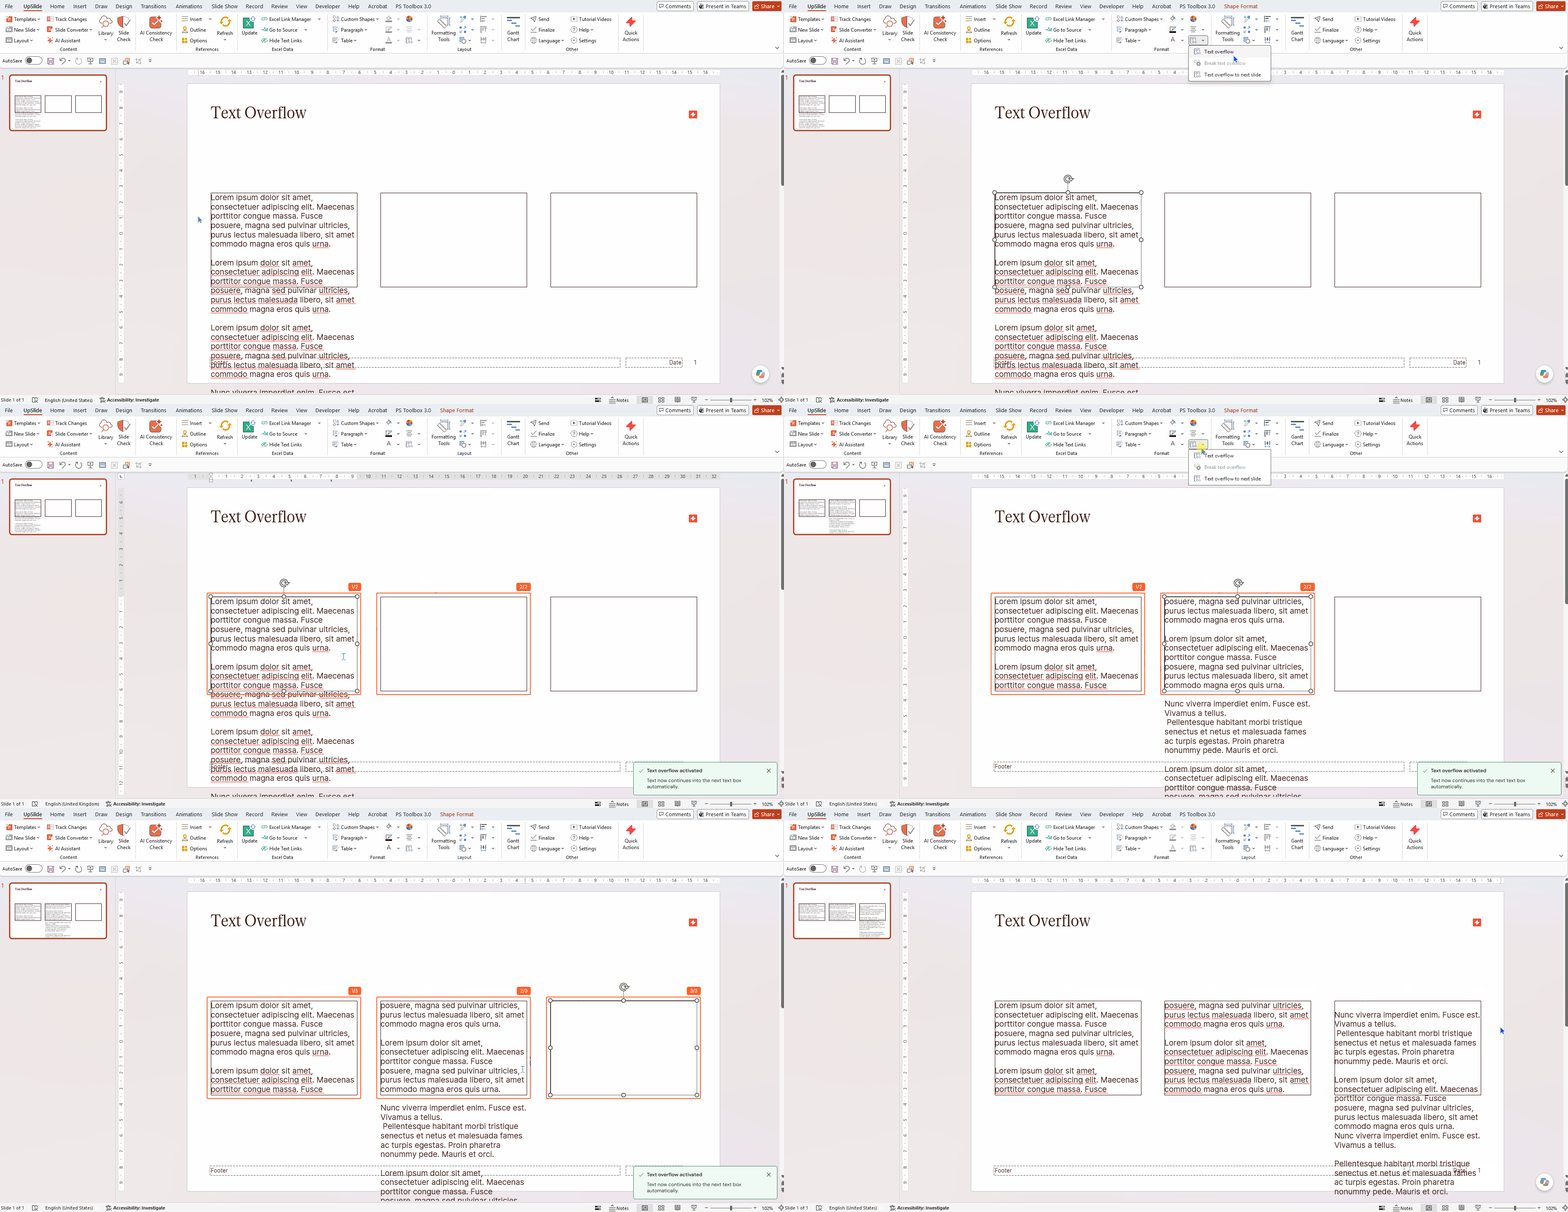
You can select only one shape at a time. To continue the overflow across multiple shapes, repeat these steps for each shape in the chain. Once the overflow is active, add text to a shape in the chain and watch the overflow automatically update. Text overflow remains active until you break the link between shapes.
Overflow text across slides
You can overflow text between shapes across different slides. To do so:
- Select the shape where you want the overflow to stop.
- In the UpSlide ribbon, select Overflow text to next slide.

The current slide is duplicated as many times as necessary to fit the text overflow and links are created between the shapes created.
Break Text overflow
To break Text overflow, select the shape where you want it to stop and click Break text overflow in the UpSlide ribbon. The result depends on the shape you select:
- If you select the first shape in the chain, UpSlide removes the Text overflow link and returns all the text to that shape.
- If you select a shape in the middle of the chain, the shapes before it remain linked.