With the UpSlide Account Portal, you can manage your signature campaigns by assigning them to group of users.
Below is the list of prerequisites for the Outlook Signature
- Access to the UpSlide portal
- Outlook Signatures activated for your account
You can contact your Sales representative if you don’t have all the prerequisites above.
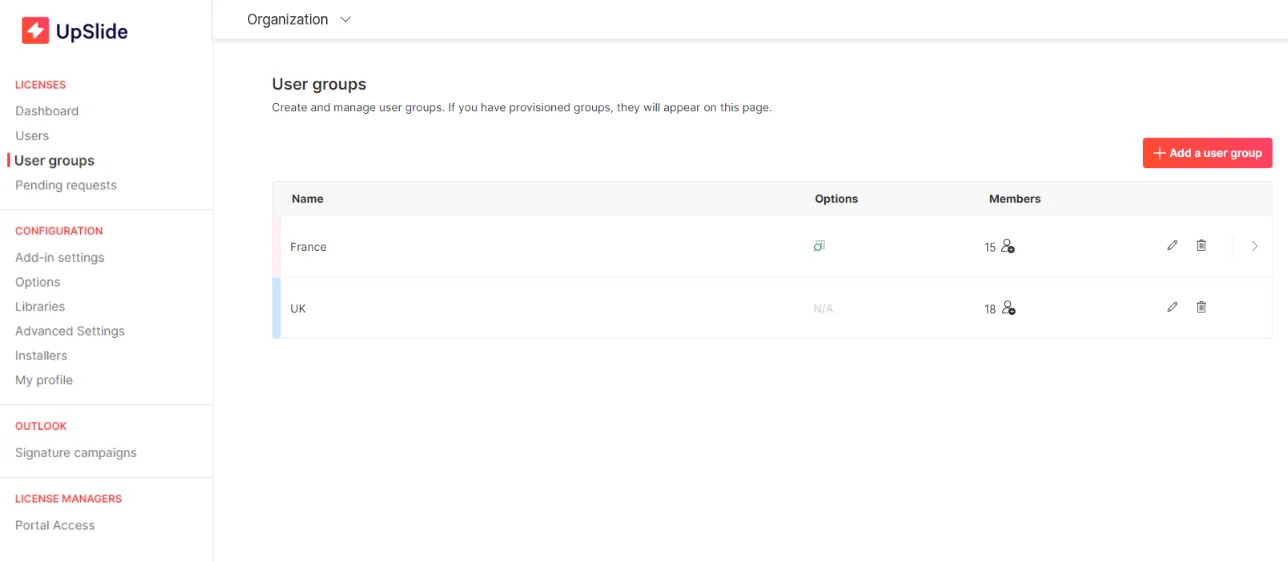
Create a user group
Before starting your first campaign, you must create at least one group of users.
Follow the instructions in our guide to create and manage user groups. Come back here after you have followed the instructions to continue the steps below.
View campaigns
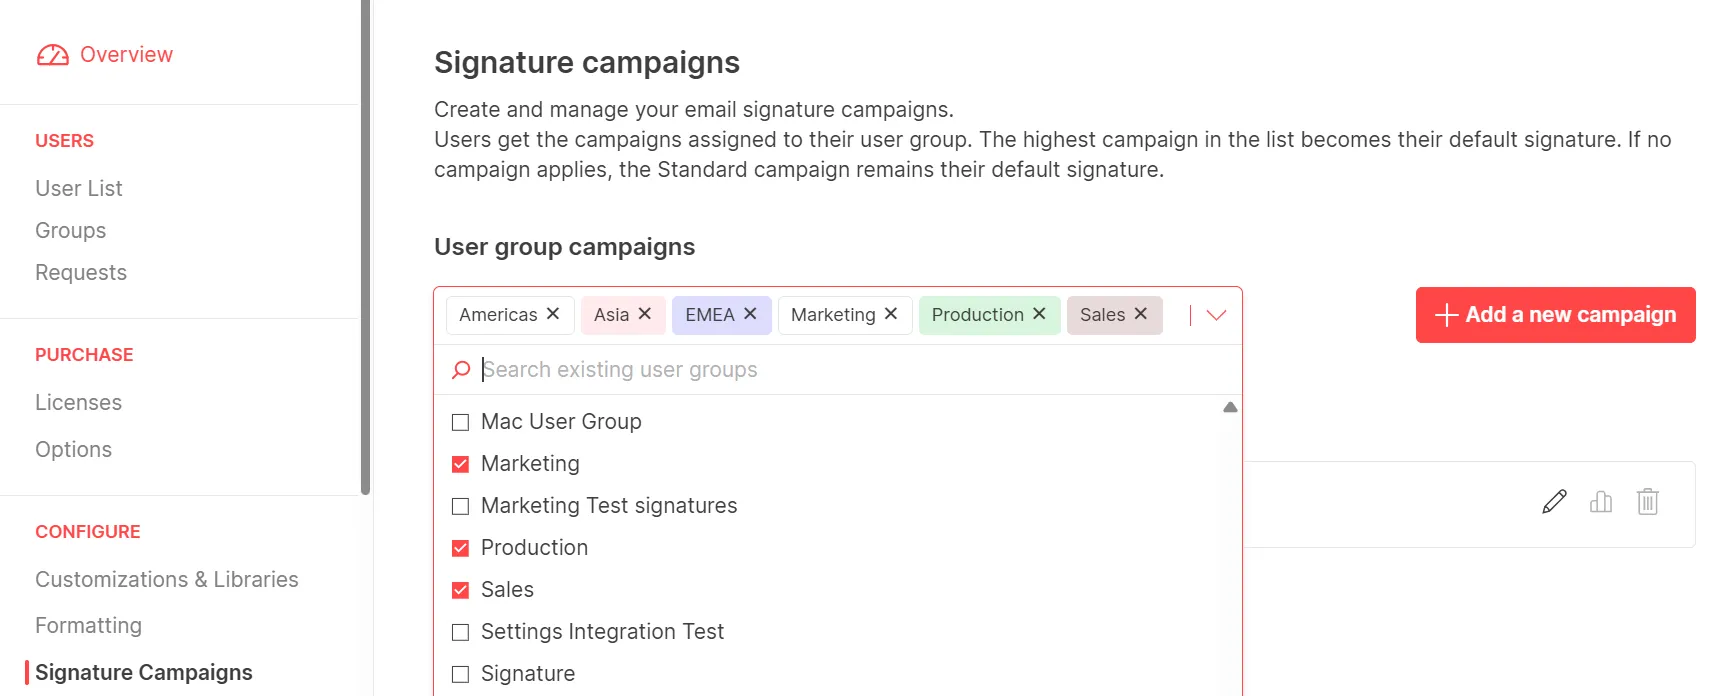
In the portal left bar menu, select “Signature Campaigns” to view all available campaigns and when they apply.
Want to see a certain user or user group campaigns? Select user group(s) to filter to reflect available campaigns.
Create a new signature
Create a campaign
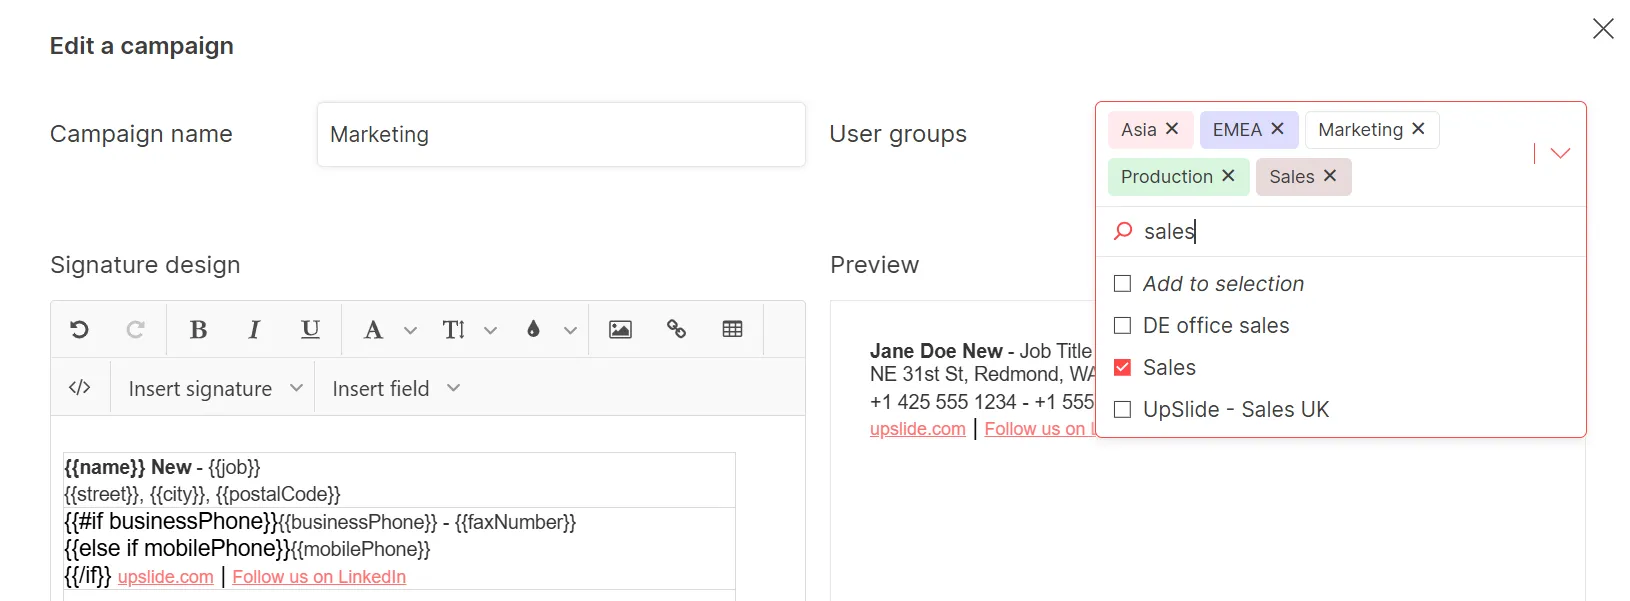
On the portal, look at the different menus on the left and select the page Signature Campaigns. You can click on Add a new campaign to create a new signature.
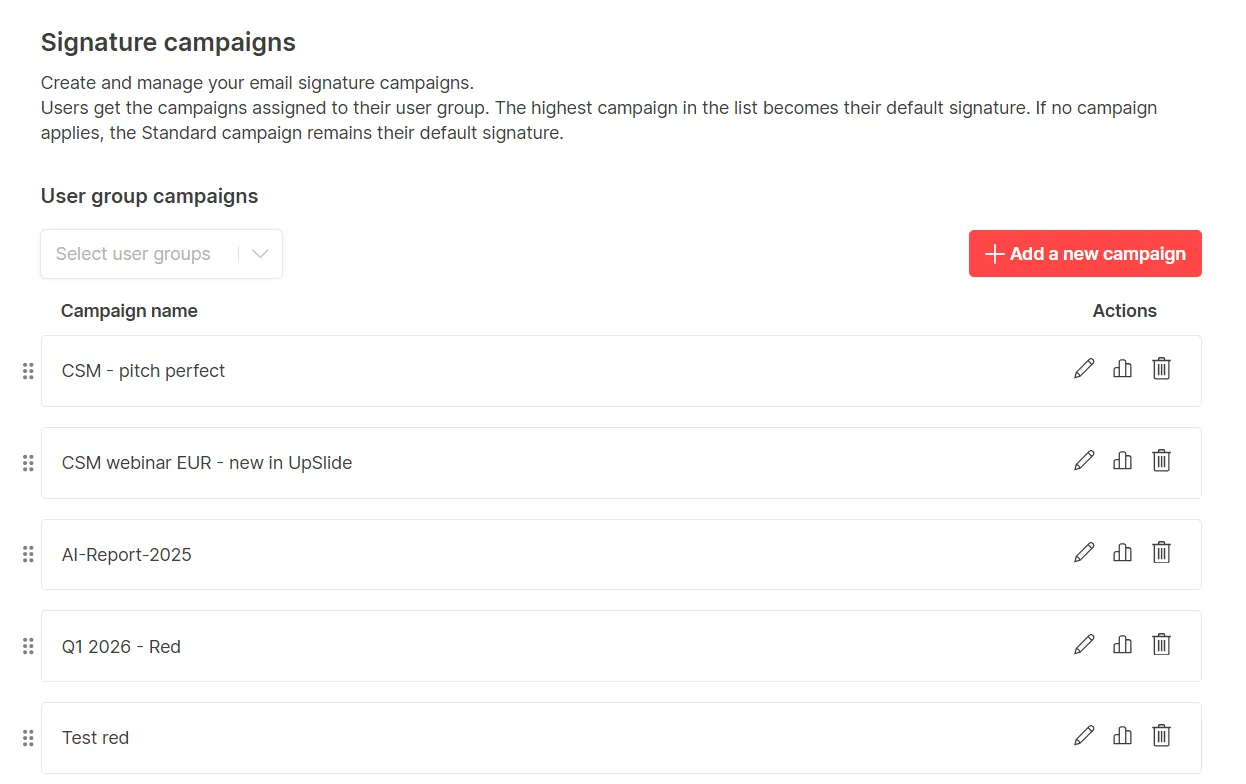
A signature campaign is composed of:
- Campaign name
- The user groups who will get the signature
- The signature
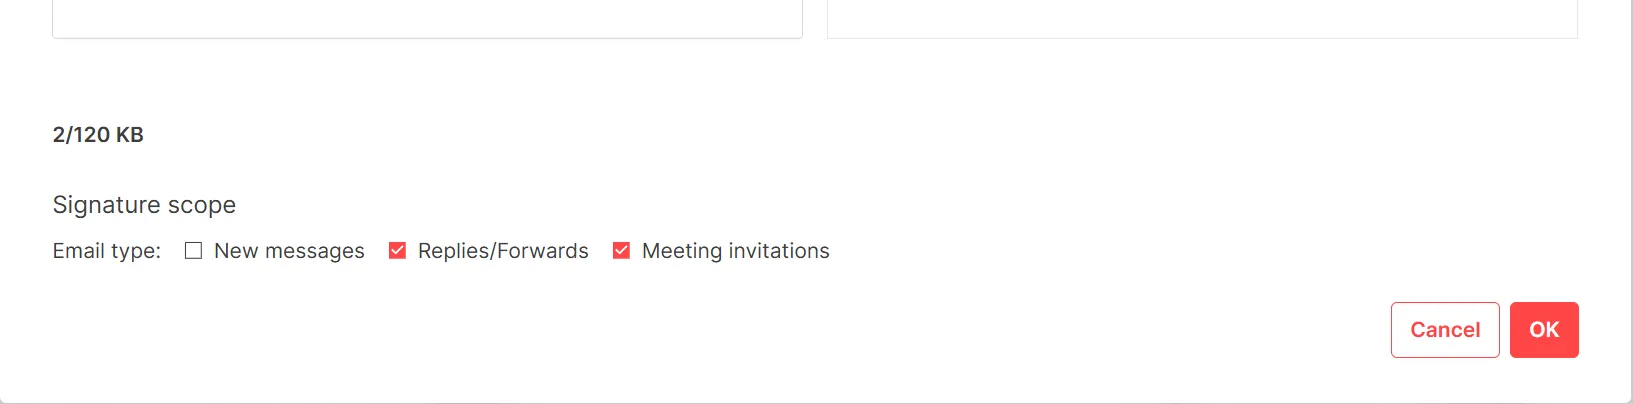
- Signature scope to precise when it is applicable
Signature editor
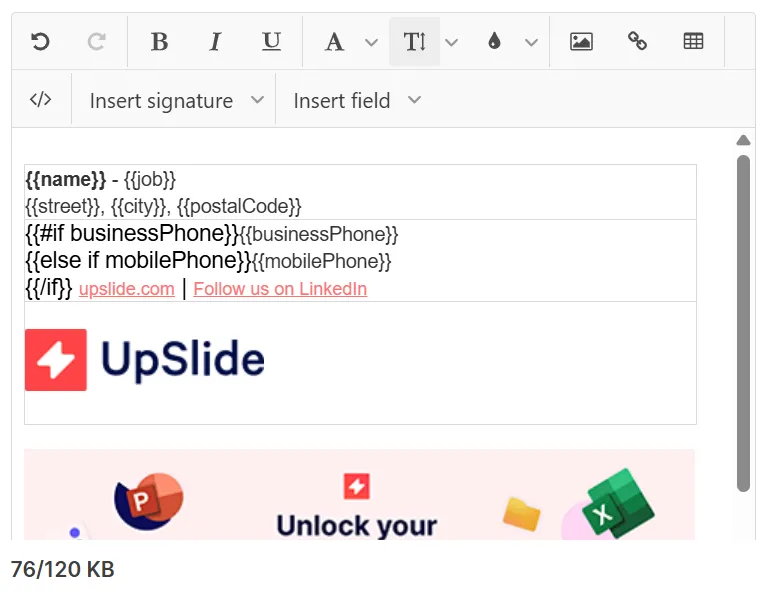
The signature editor allows you to insert:
- Text in different sizes, fonts and colours
- Images from your computer, or an URL (image hosted on a webserver)
- Insert signature from an existing campaign in order to duplicate and adapt it
- Insert fields that will be replaced by each user information.
These fields come from your organization data in MS EntraID User profile.
If enabled in Signature Campaigns list page (“Authorize edition of personal information”), user may override these EntraID info. See Using the Outlook signature add-in – UpSlide Help & Support
On the right of the editor, you will have a preview of the signature with an example of how the contact information will appear.
If you want to create a signature with another editor, you can copy-paste the HTML code of your signature by clicking on the button </> (Change mode).
Assign user groups to a campaign
When your signature is ready to be deployed to your users, you can assign it to the relevant groups by selecting them on the top-right dropdown.
Signature scope
As License Manager, you can restrict the application scope of a signature to a specific Email type: New email, Reply or Forward email, or Meeting invite. Each user will receive 3 prioritized lists of campaigns. By default, all three are checked, meaning it applies to whatever the email type.
The signatures are shared between the accounts you manage. You can assign user groups from different accounts without creating a signature for each one.
User group campaigns priority
When creating and managing signature campaigns, you can assign user groups to each one you create.
User group campaigns take priority over the standard campaign for the groups concerned. Therefore, the default signature when creating a new email message will be from the campaign to which their user group is assigned.
You can adjust the order of your campaigns by clicking and dragging each campaign. This will change the campaign’s priority, which the user will see by default in their task pane. By default, the user will get the highest-ranking signature they are assigned.

In the example above, we’ve dragged and dropped the campaign for groups A and B below the campaign for group A, which means:
- Group A’s default signature will be Campaign Group A.
- Group B’s default signature will be Campaign Group A&B.
Users can still select the other signatures assigned to them in their UpSlide Signatures task pane.