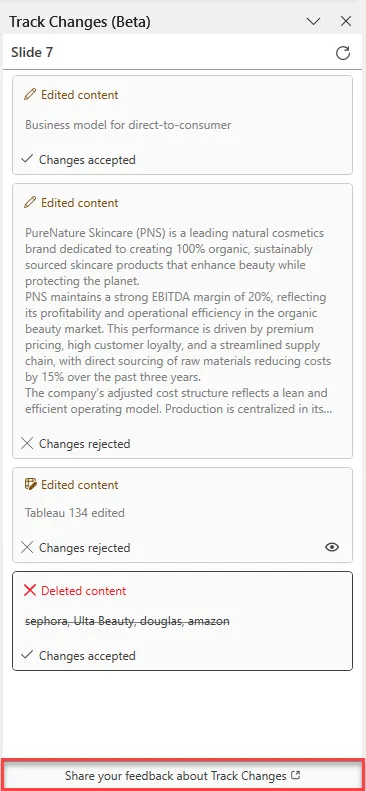
UpSlide’s Track Changes allows you to track text, tables and chart changes between two versions of the same PowerPoint presentation and directly within PowerPoint, approve or decline changes that have been made to the document.
What can you do with Track Changes?
You will be able to track directly in PowerPoint and/or export a markup version of the changes in a PDF report of:
- Text changes in any placeholder
- UpSlide Excel Linked tables and charts updates
- PowerPoint tables changes
- PowerPoint chart changes
- Added or deleted slides
To maintain a clear and focused interface, Track Changes ignores edits to the agenda slides, section dividers, breadcrumbs, reminders, footers and page numbers.
Where to start
To begin, make sure that you have access to the previous version you want to track your current presentation with and:
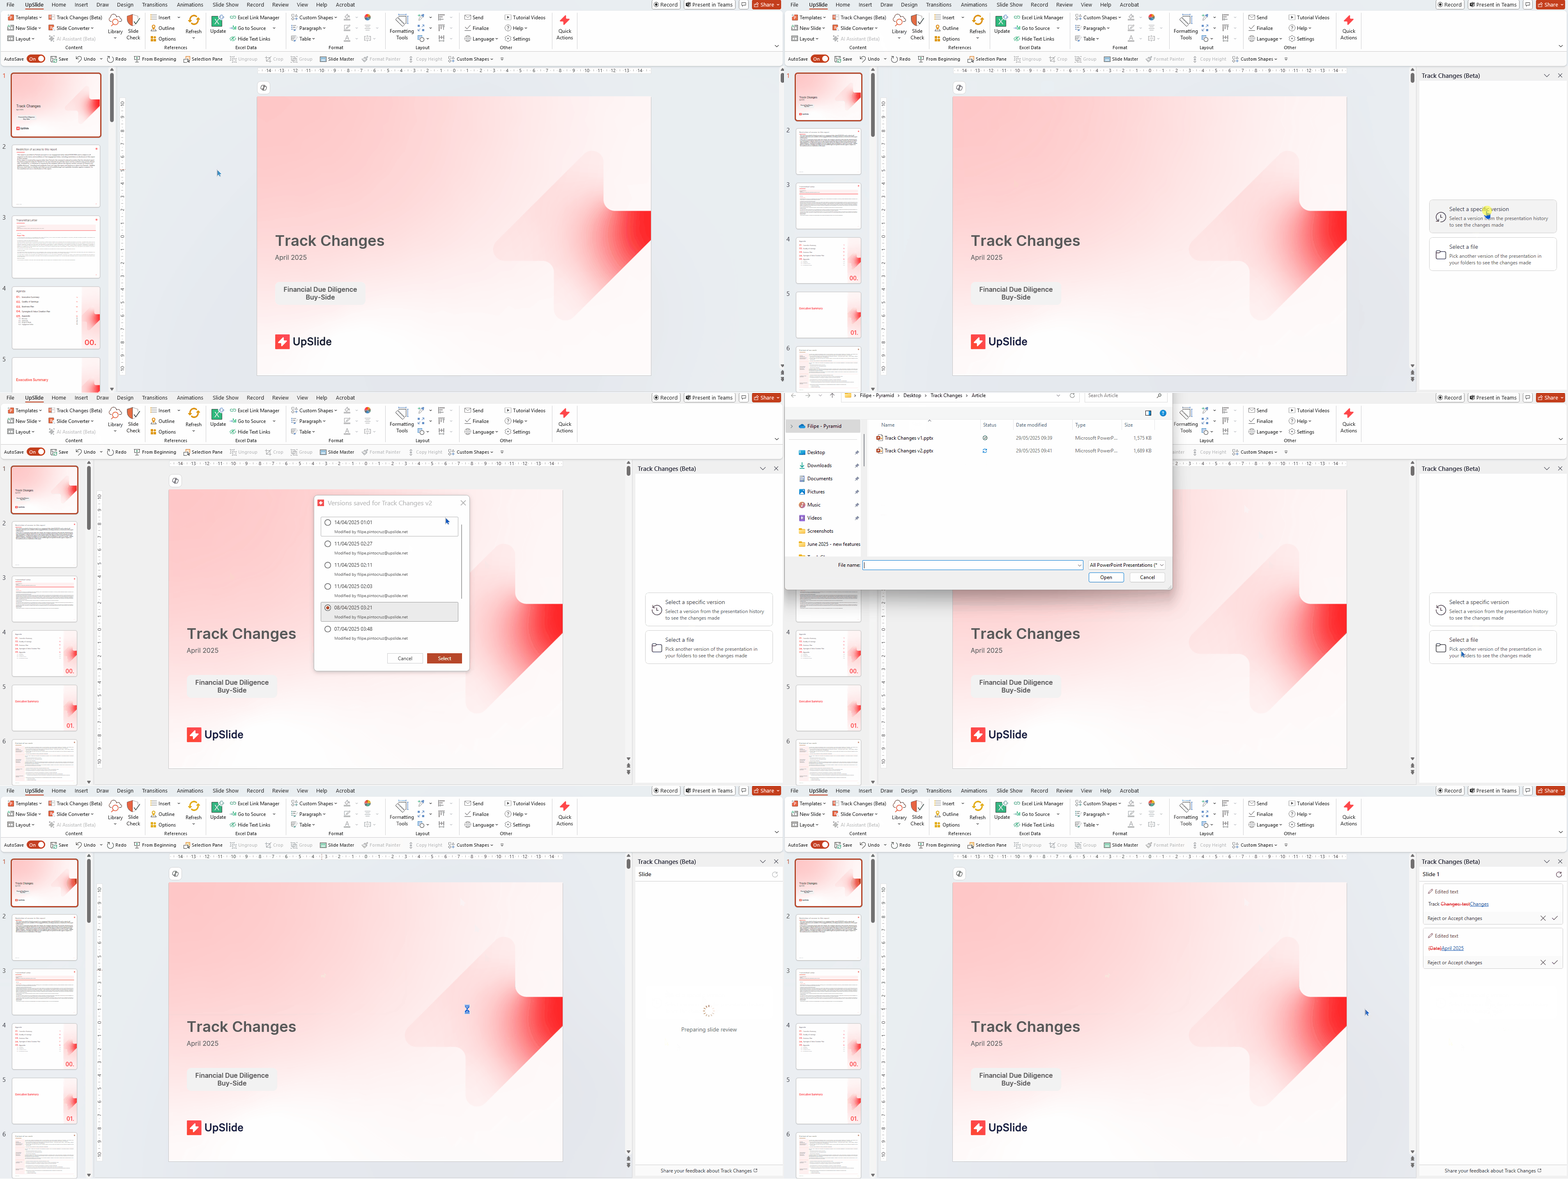
- In the new presentation, navigate to the UpSlide ribbon and select Track Changes
- In the right-hand side Track Changes pane, press you can:
- Select a specific version: navigate through the presentation SharePoint history to track changes
- Select a file: pick another version of the presentation saved on your folders to track changes
- Select the version or file you want to track changes with and select Open
- You will now see the changes in the presentation on each slide where a change has been done
How to navigate the Track Changes pane
After selecting a presentation to compare to:
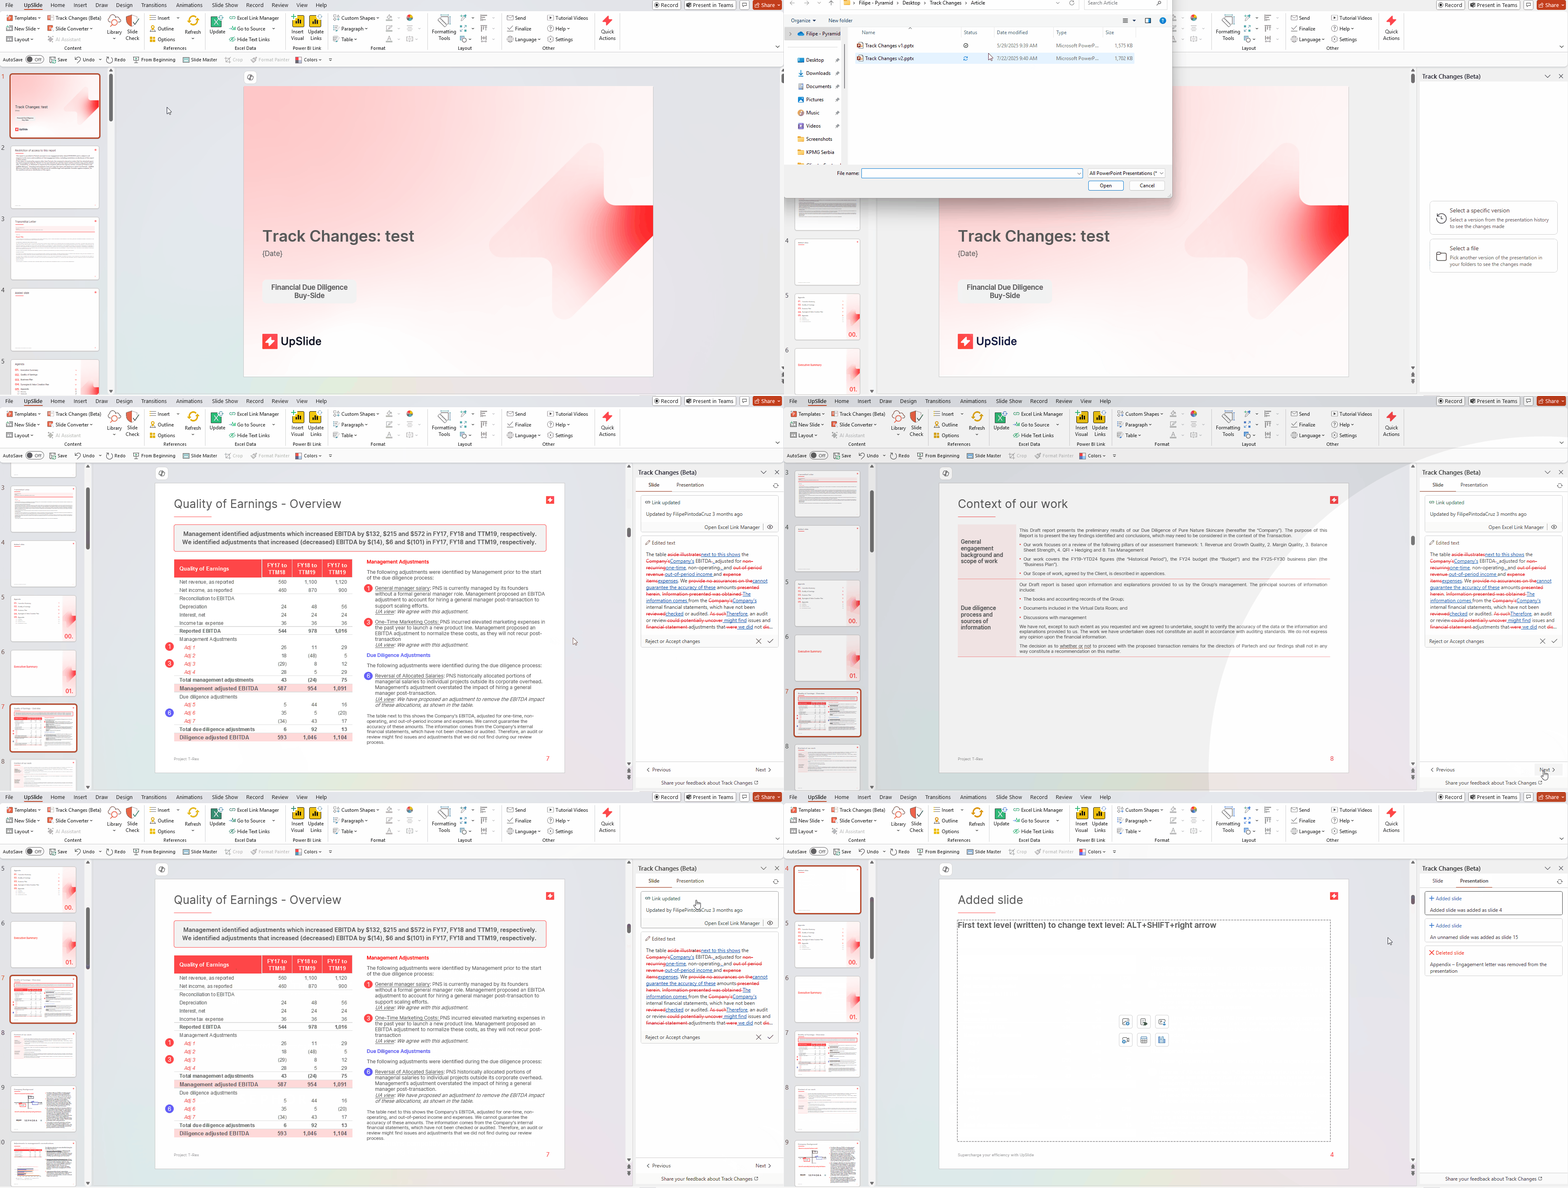
- UpSlide will automatically take you to the first slide where a change has been identified
- Use the Previous or Next button to easily navigate through each change
- Use the Slides or Presentation tabs to review changes done to a slide or to the presentation (ie. added or removed slides)
How to review the changes
Review changes done to each slide:
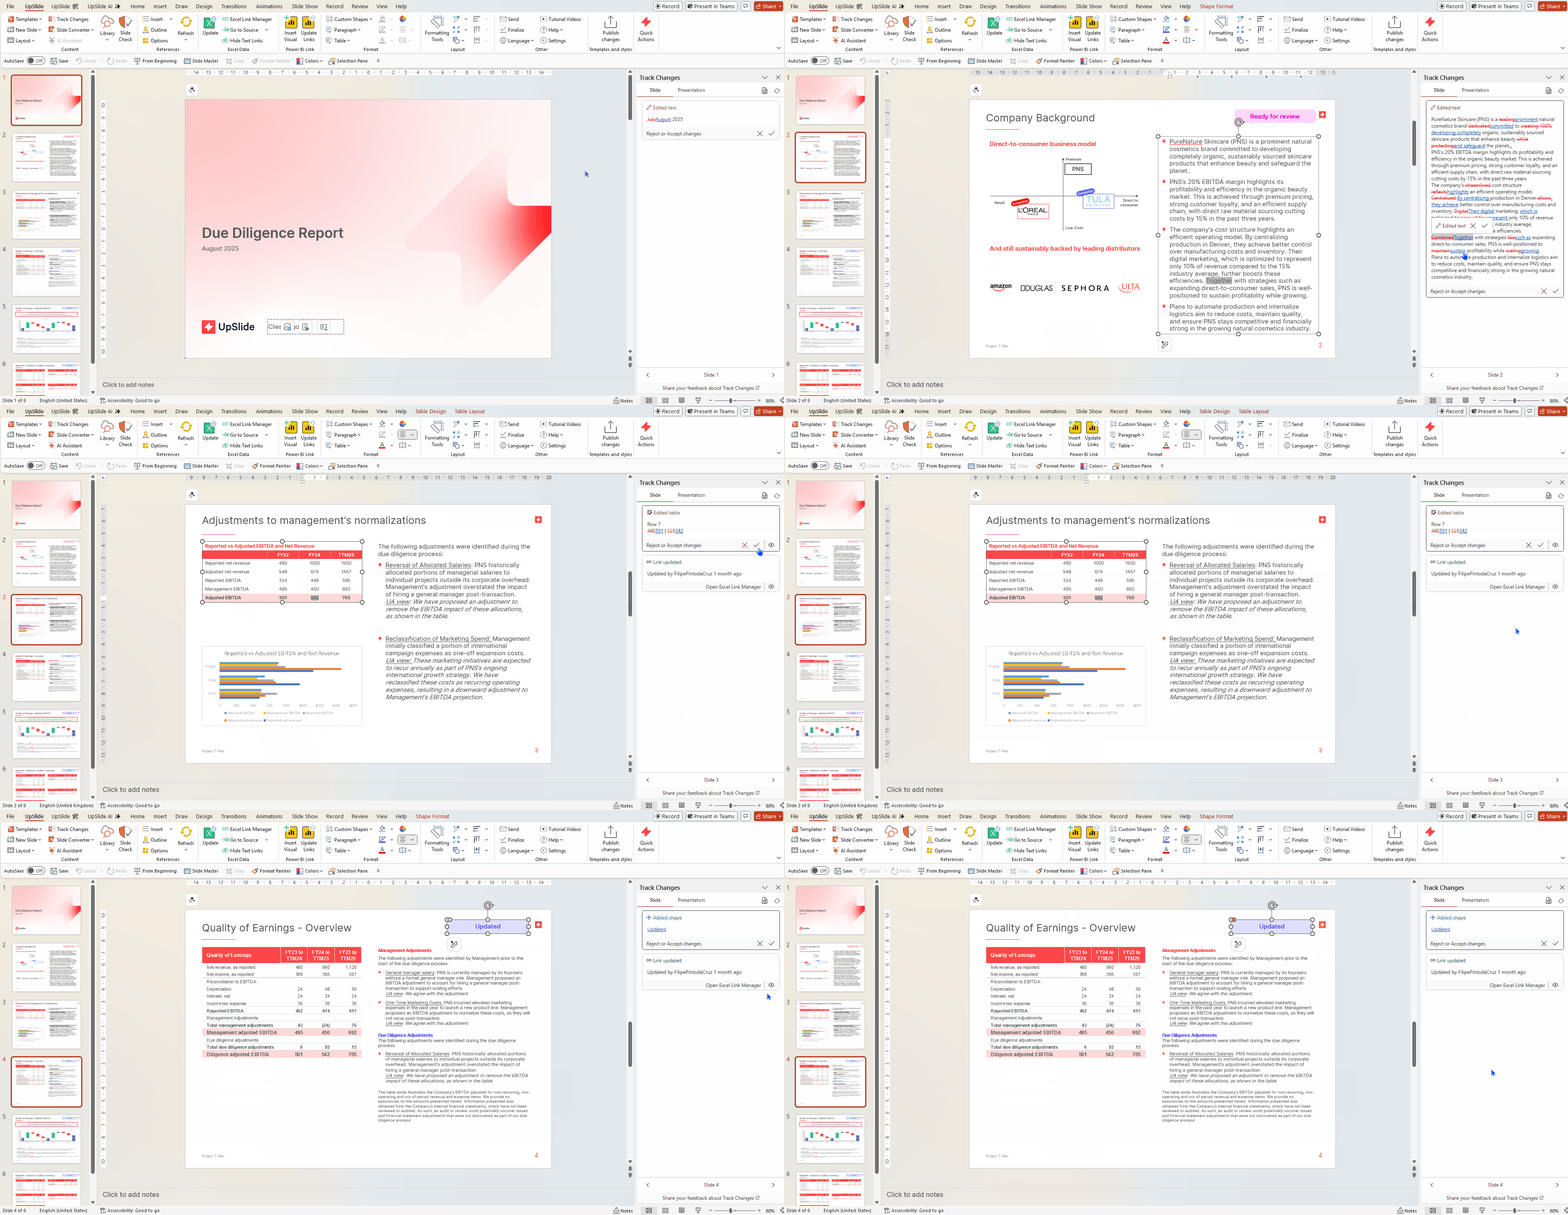

In the Slides tab, navigate through your presentation to see changes from one version to another in the Track Changes pane. There are three types of changes:
- Edited text/table/chart
- Deleted content
- Added content
The change type will be visible at the top of each tracked change in the pane.
Edited content will be tracked as follows:
- Deleted text in a textbox or PowerPoint table will appear as red strikethrough text
- Inserted text in a textbox or PowerPoint will appear as blue underlined text
- PowerPoint table and chart will give you the option to view the previous version
- Updates to UpSlide Excel Linked tables and charts will take you to the Excel Link Manager and give you the option to see the previous version.
Deleted content will be tracked as follows:
- Deleted textbox will appear as a full red strikethrough text
- Deleted PowerPoint table or chart will give you the option to view the previous version
- Images deleted will give you the option to see what it was
Added content will be tracked as follows:
- Inserted textboxes will appear as blue underlined text
- Added images will be shown as a tracked change
If you make any changes in your report while the Track Changes pane is opened, simply press the Refresh button in the pane to identify your tracked changes.
Currently, if you refresh the pane, any accepted changes will re-appear as a tracked change.
Review changes done to the presentation:
In the Presentation tab, you will find all the added or removed slides. Select an added slide to automatically go there or use the eye icon to view and retrieve the deleted slides.
How to accept or reject changes
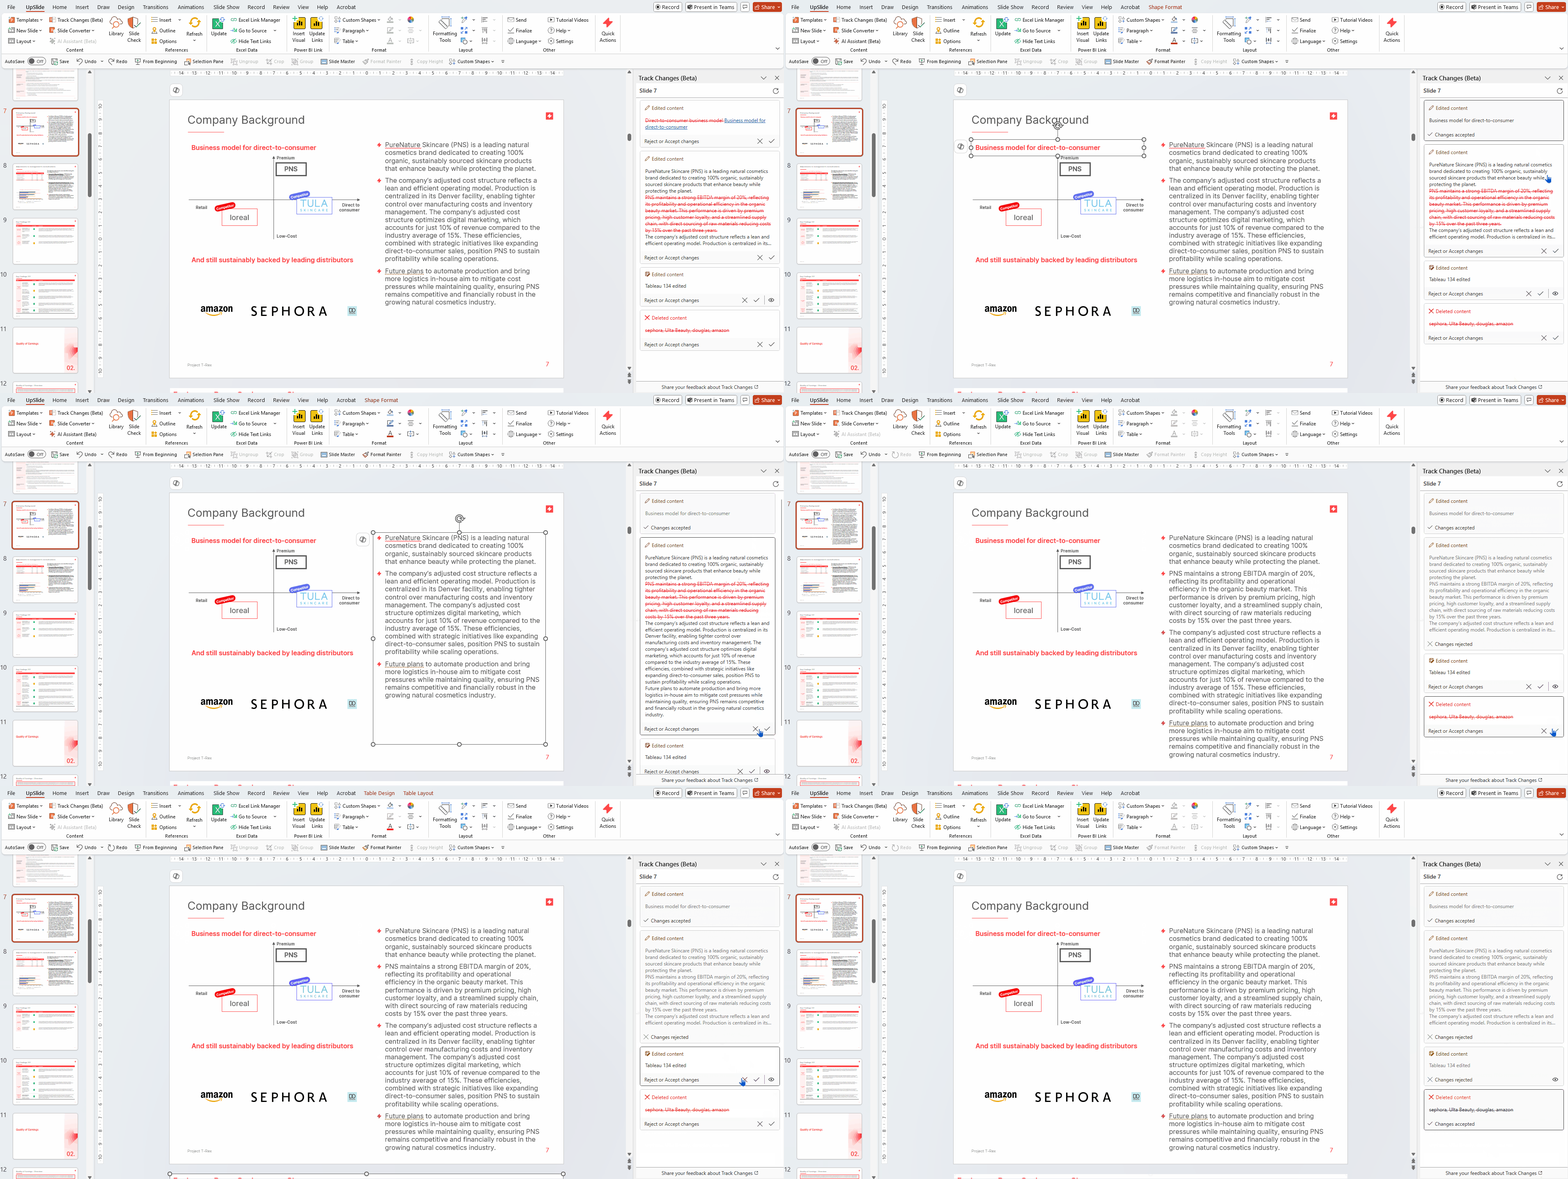
When you are reviewing your presentation you can accept or reject changes:
- For each tracked text and PowerPoint table change in the Track Changes pane, press on Accept or Reject, at either the placeholder level or each change level
- If you want to revert back your changes, press Undo at the change level (coming w/c 12th of May)
How to export a markup PDF file of the changes?
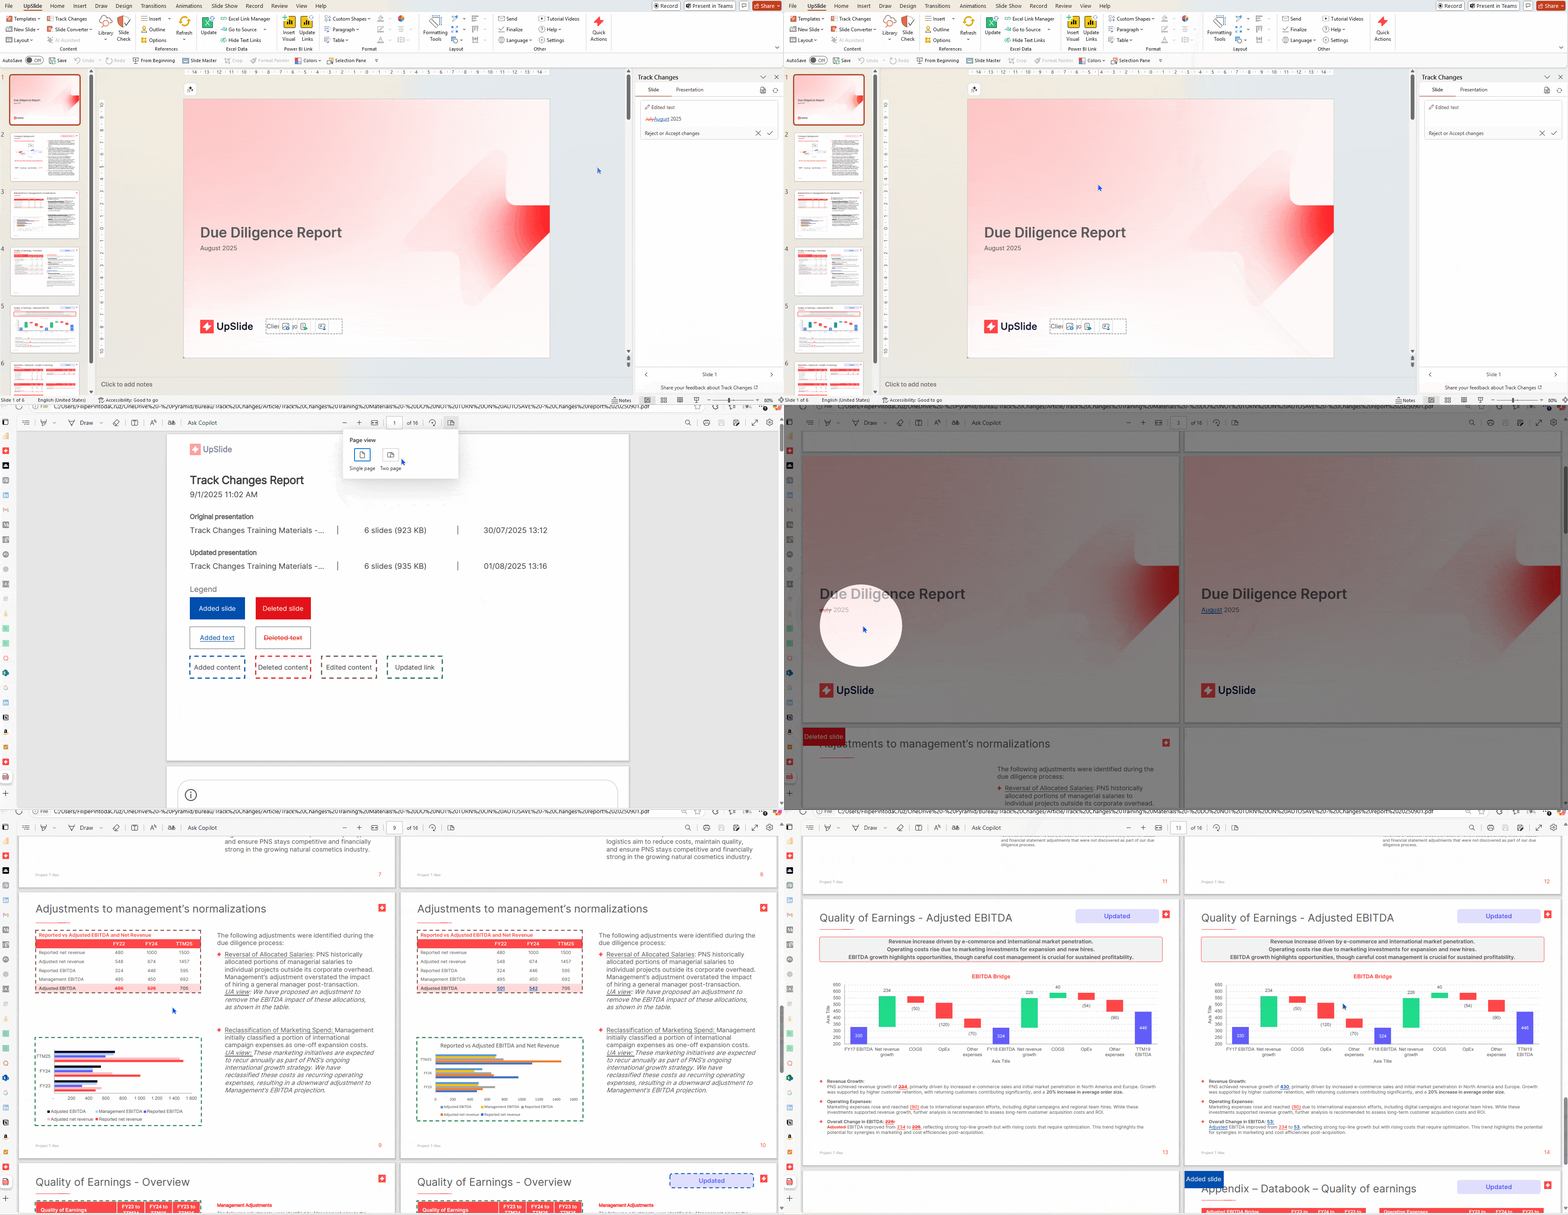
The PDF report will show a comparison of the previous version to the new one, marked up where the changes have been done. To generate a PDF report of the changes follow the steps below:
- Select the PDF button at the top right-hand corner of the Track Changes Pane
- Enter a file name and the location where you want it to be saved
- The PDF report will open once generated
We recommend using a two-pages view mode view to review all slides side by side. On the left hand side you will see the version used to compare to and on the right the updated version will appear (version used to create the martkup version).
Share your feedback
Share your feedback and any improvements you would like to see directly through the Track Changes pane.