UpSlide is fully compatible with SCCM Deployment. The following page describes how in detail.
If you’re installing UpSlide for the first time, be sure to look at requirements and prerequisites before going forward with the installation.
If you’ve received a new installer from our team, make sure to update the detection rule in the UpSilde packaging.
Summary
.NET Framework packaging
For UpSlide to function, .NET Framework needs to be installed. This section describes how to create the package on System Center Configuration Manager.
The first step is to download the offline package of .NET Framework from this link: https://www.microsoft.com/en-us/download/details.aspx?id=42642
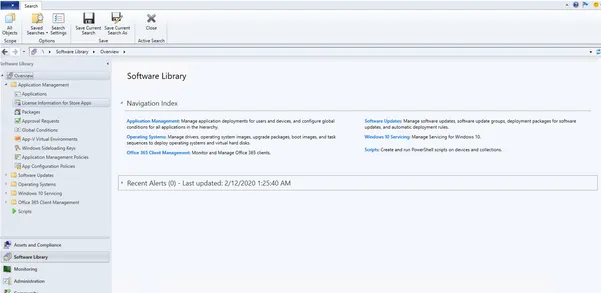
Once downloaded, open the Configuration Manager Console.
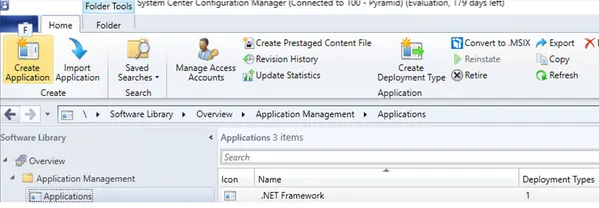
Next, go to Applications and select Create Application.
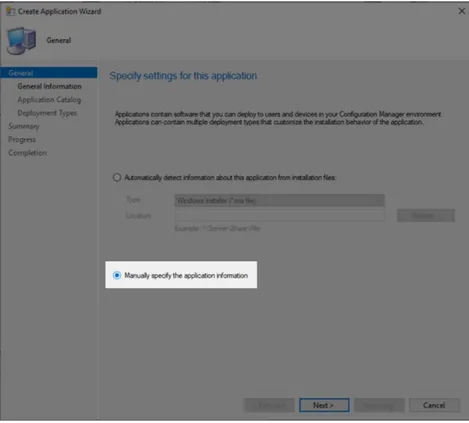
On the general page of the Create Application W izard, select Manually specify the application information, then click Next.
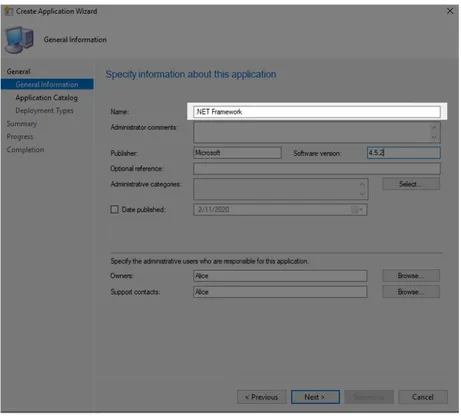
Specify general information about the application, such as the name and version.
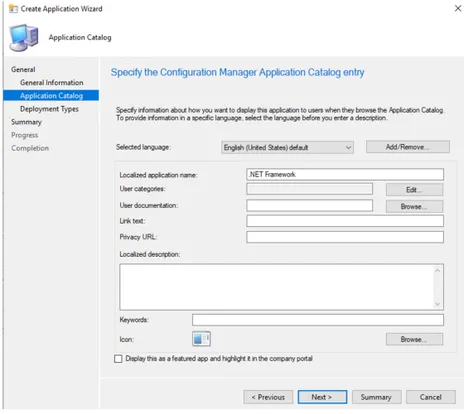
In Application Catalog, enter the application details such as the name and language and click Next.
In Deployment Types, click on _Add_to create a new deployment type.
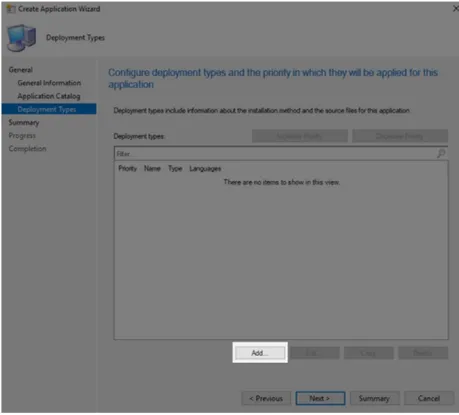
The Create Deployment Type Wizard will open.
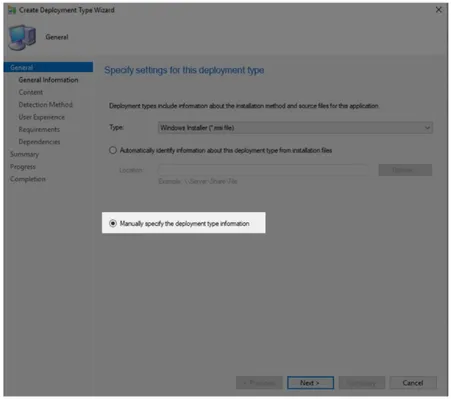
On the general page of the Create Deployment Type Wizard, select Manually configure the deployment type information.
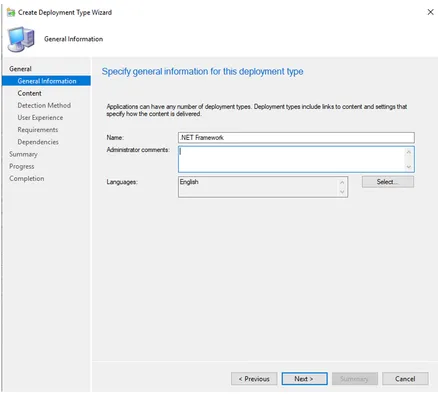
In General Information, enter deployment details such as the name and comments. Then, click Next.
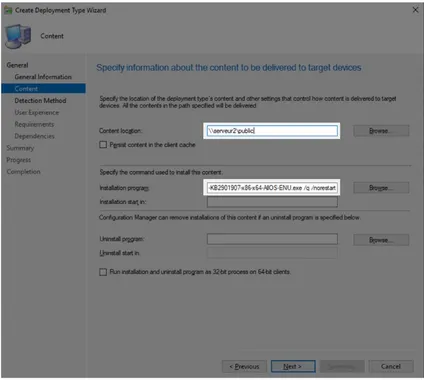
On the Content page, fill in these two fields:
- Content location: Path to .NET Framework Install File
- Installation program: {.NET Install Filename}.exe /q /norestart
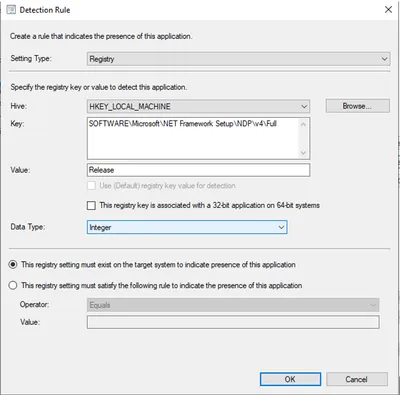
Next, configure the detection methods to indicate the presence of the application with these settings:
- Setting type: Registry
- Hive: HKEY_LOCAL_MACHINE
- Key: SOFTWARE\Microsoft\NET Framework Setup\NDP\v4\Full
- Value: Release
- Data type: Integer
- Select This registry settings must exist on the target system to indicate presence of this application.
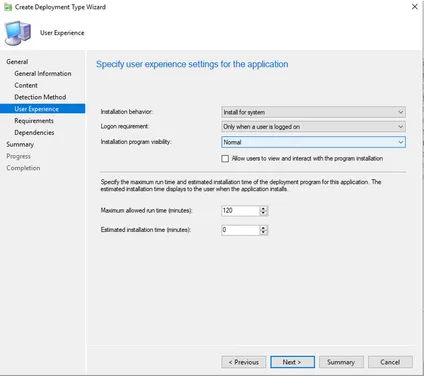
Validate the Detection Rule. On the User Experience screen, specify these settings:
- Installation behavior: Install for system
- Logon requirement: Only when a user is logged on
- Installation program visibility: Normal
Click Next and leave the Requirements and Dependencies pages with default settings. Close the Deployment Type Creation Wizard.
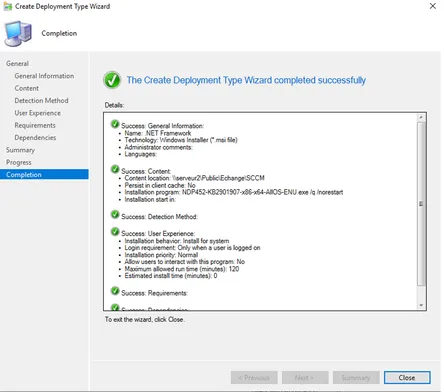
Select the newly created deployment type in the Application Creation Wizard > Deployment Types and click Next.
Close the Application Creation Wizard. You can now push your application to the distribution point.
Visual Studio Tools for Office Runtime (VSTO)
For UpSlide to function, Visual Studio Tools for Office Runtime needs to be installed. Please follow these steps to create the package in System Center Configuration Manager.
The first step is to download the offline package of VSTO from this link: https://www.microsoft.com/en-us/download/details.aspx?id=105522
Once downloaded, open the Configuration Manager Console and create a new application.
In General, select Manually specify the application information and click Next.
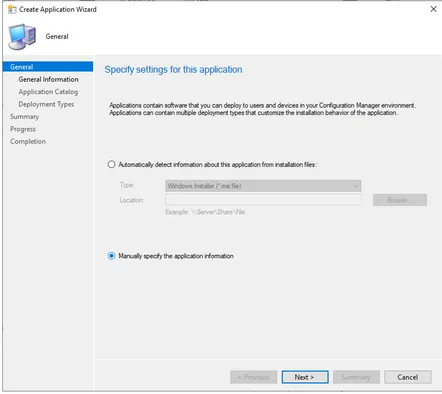
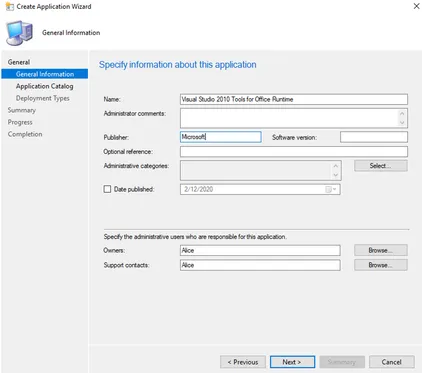
In General Information, enter applications details such as the name and version, and click Next.
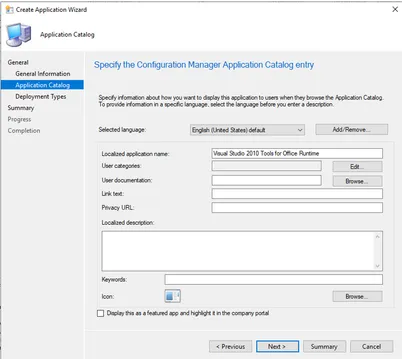
In Application Catalog, enter applications details such as the name and language and click Next.
In Create Application Wizard > Deployment Types, click Add to create a new deployment type.
The wizard will open on the General tab. Please select Manually configure the deployment type information.
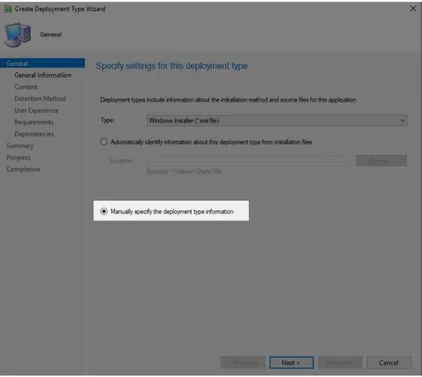
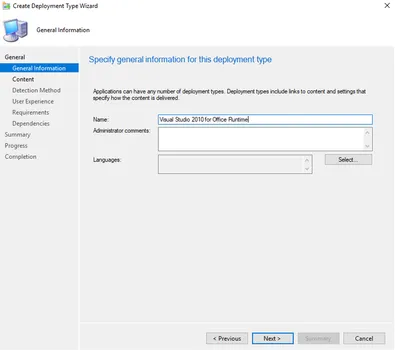
In the General Information tab, enter deployment details such as the name and comments, and click Next.
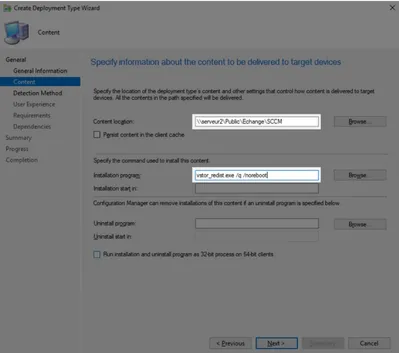
In the Content tab, fill in these two fields:
- Content location: Path to VSTO Install File
- Installation program: {VSTO Install Filename}.exe /q /norestart
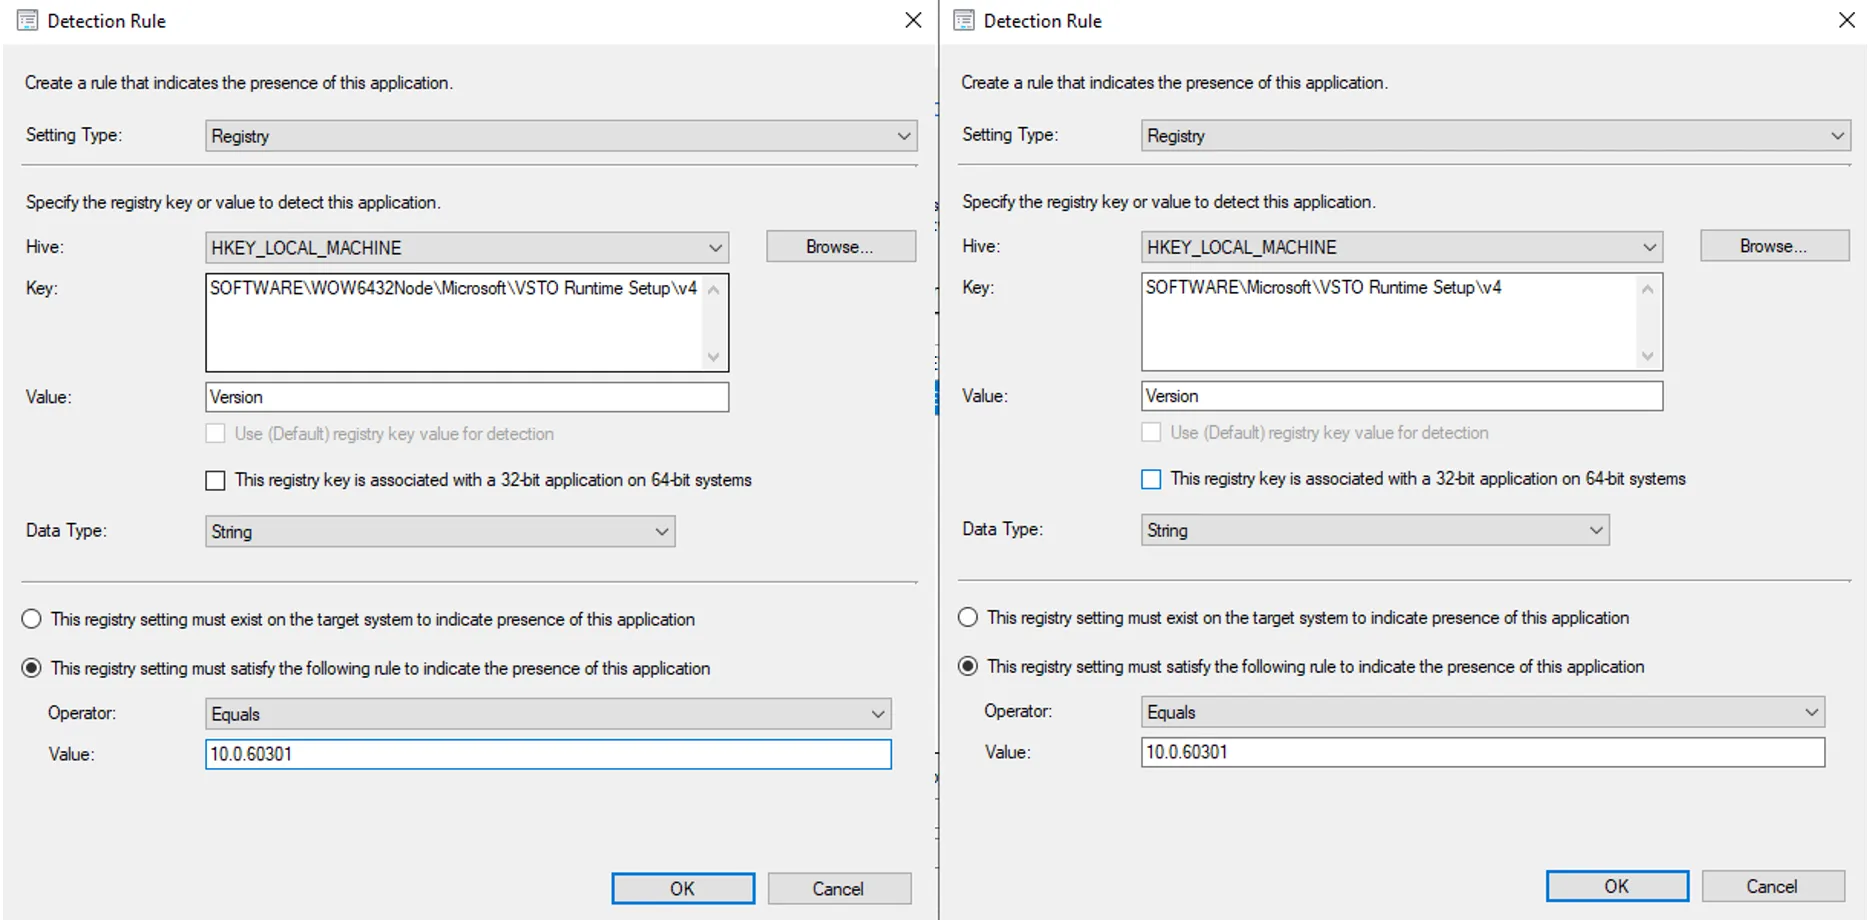
On the next screen, define the detection method. Select Add a Clause and fill with these settings:
For x64 Systems:
- Settings type: Registry
- Hive: HKEY_LOCAL_MACHINE
- Key: SOFTWARE\WOW6432Node\Microsoft\VSTO Runtime Setup\v4R
- Value: Version
- Data type: String
- Select This registry settings must satisfy the following rule to indicate the presence of the application
- Operator: Equals
- Value: Version of VSTO downloaded (on our case 10.0.60301)
For x86 Systems:
- Settings type: Registry
- Hive: HKEY_LOCAL_MACHINE
- Key: SOFTWARE\Microsoft\VSTO Runtime Setup\v4R
- Value: Version
- Data type: String
- Select This registry settings must satisfy the following rule to indicate the presence of the application
- Operator: Equals
- Value: Version of VSTO downloaded (on our case 10.0.60301)
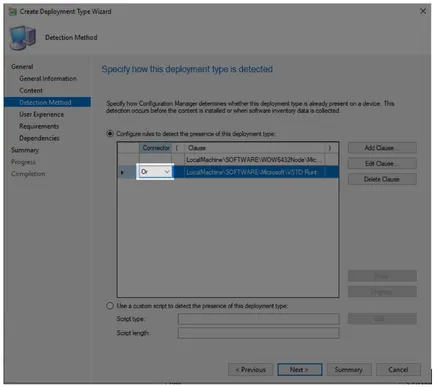
You can keep the two clauses to ensure compatibility with x64 and x86 clients. The condition between the two clauses needs to be changed first from And to Or and validate the detection rule_._
In the User Experience tab, specify these settings:
- Installation behavior: Install for system
- Logon requirement: Only when a user is logged on
- Installation program visibility: Normal
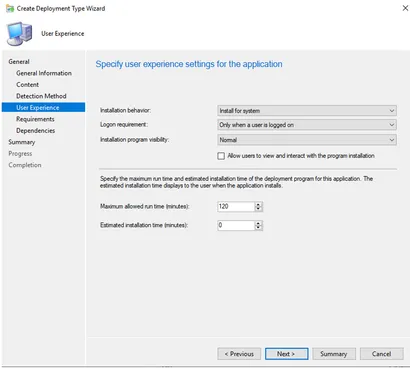
Finish the Deployment Type Wizard.
Select the newly created deployment type in Application Creation Wizard > Deployment Types and click on Next, then finish the wizard. You can now push your application to the distribution point.
UpSlide packaging
This part consists of creating an UpSlide application in SCCM and installing the prerequisites beforehand if they are not detected on the computer.
Create application
Open the Configuration Manager console.
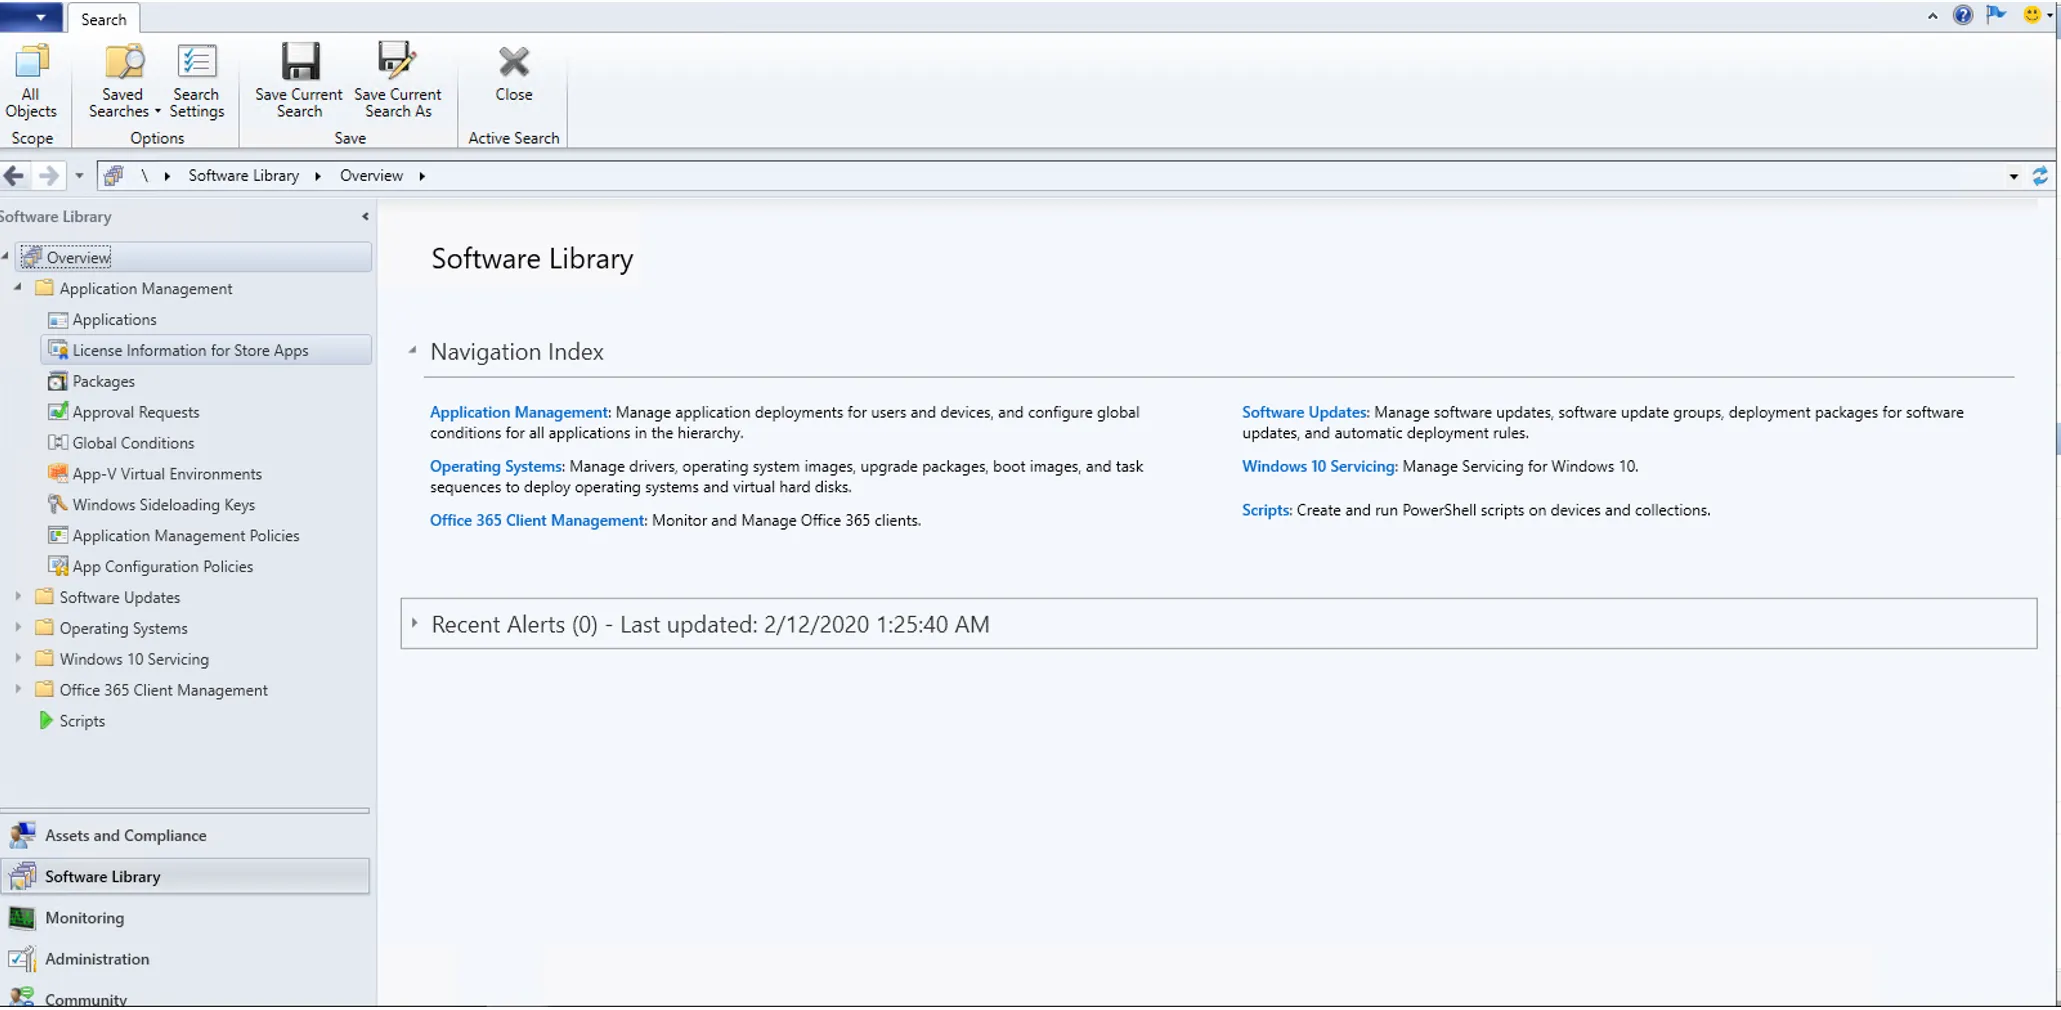
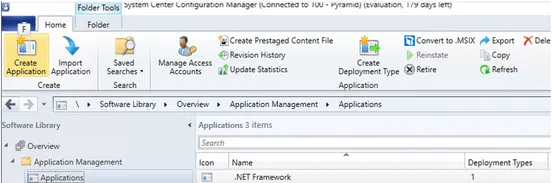
Next, go to Applications and select Create Application.
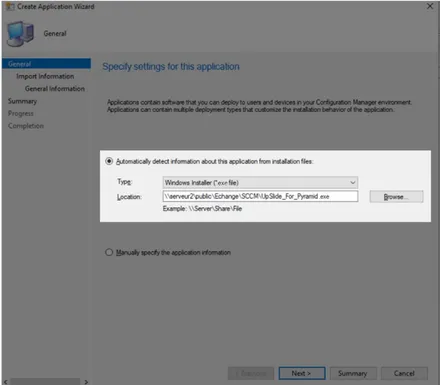
In the Create Application Wizard > General, select Automatically detect information about this application from installation files:
- Type: Windows Installer (*.exe file),
- Location: Path to UpSlide EXE installer.
Click on Next. The default parameters should load automatically.
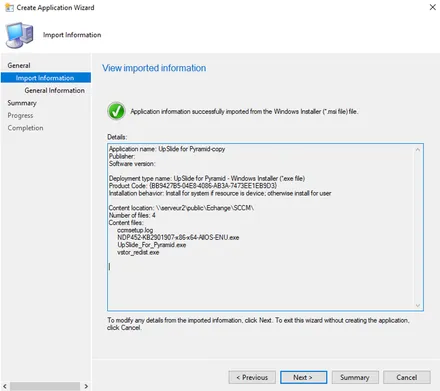
In the General Information tab, you can configure the UpSlide installer to run silently.
Fill the Setup Software field with: Upslide.exe” -q2 “CheckProcesses=0”
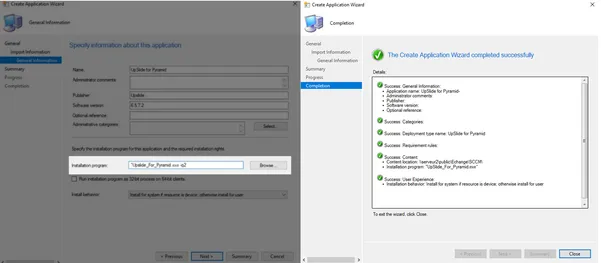
You can find all the command line switches in this article
To have the application marked as successfully installed by SCCM, the detection method needs to be changed first.
Configure the detection methods
Go back to Configuration Manager Console > Applications > UpSlide and go to Deployment Types.

Edit the properties of the deployment type associated with the UpSlide application.
- Right-click on Deployment Type > Properties > Detection Methods.
- Create the detection methods
Binaries folder:
- Setting Type: File System
- Type: File
- Path: C:\ProgramData\UpSlide\Binaries
- File or folder name: Finance3point1.UpSlide.Engine.dll
- Select This file system setting must exist on the target system to indicate the presence of this application.
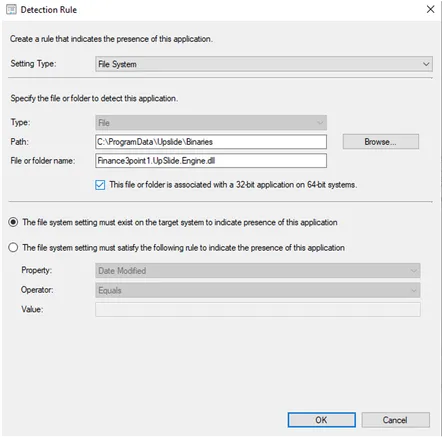
Setup version
Second rule to detect the setup installation version (useful to deploy a new version):
- Setting type: Registry
- Key Path: HKEY_LOCAL_MACHINE\SOFTWARE\Microsoft\Office\Excel\Addins\Finance3point1.UpSlide.Excel
- Value name: SetupVersion
- Detection method: Version comparison
- Operator: Equals
- Value: Your targeted version (it will be in your exe file name furnished by your consultant)
Be sure to set the detection rule on the SetupVersion, not the Version. UpSlide uses auto-update to provide bug fixes and feature improvements in new versions of UpSlide. If you set the detection rule on the Version, it will skew with the auto-update.
Install for all users
The next step is to tell SCCM to install UpSlide for all users.
Go to User Experience, and in Installation Behavior, select Install for system.
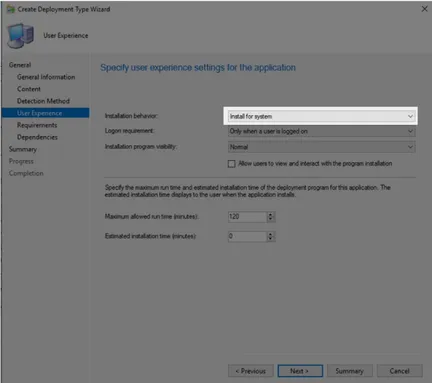
Add dependencies
The last step of this guide is to add the dependencies to VSTO and .NET Runtime packages configured earlier in this guide.
Add two dependencies to .NET Runtime Applications and VSTO Application in the Dependencies tab and click OK.
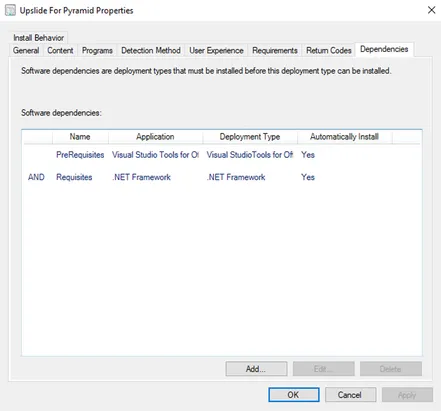
The UpSlide package is now successfully configured and ready to be pushed to users.